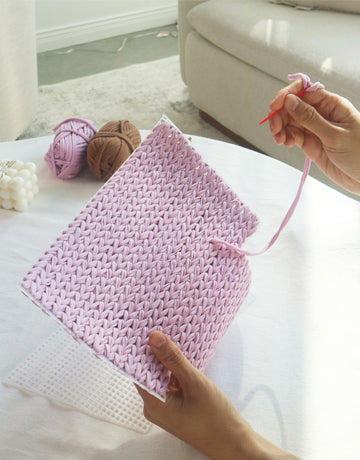

Embroidering on crochet is a fantastic way to elevate your yarn projects, adding a layer of unique detail and personality. By blending the textured world of crochet with the fine art of embroidery, you can transform a simple beanie, blanket, or amigurumi into a bespoke masterpiece. This guide covers the essential techniques, tools, and stitches you need to start.
The key to success is working with the unique, open-weave texture of crochet fabric. This involves using specific tools like a blunt-tipped tapestry needle and a stabilizer to prevent stitches from sinking and the fabric from puckering. With the right approach, you can create clean, beautiful designs on any crocheted item.
A How-To Guide: Getting Started with Crochet Embroidery
Adding embroidery can completely transform a project. Think about giving amigurumi expressive little faces, adding a floral pattern to a blanket, or personalising a simple beanie. It’s a wonderful way to blend two beloved fibre arts.
Unlike stitching on tightly woven fabric, crochet has a natural stretch and those familiar gaps between stitches. This just means we need a slightly different approach to get our embroidery looking its best.
This combination of crafts might feel new, but it has a surprisingly rich history. During the California Gold Rush, for example, Irish immigrant women used a technique called tambour embroidery on crochet-like bases to support their families. By 1852, their intricate lacework was selling for up to $5 a piece—that’s over $180 in today’s money! Some workshops were even producing 10,000 units a year. It's amazing to think we're continuing that same spirit of artistry and resourcefulness today. You can explore the journey of crochet from humble beginnings to a celebrated craft to learn more.
Fundamental Principles for Success
Before you thread your needle, understanding a few key principles will ensure your first attempt is a success. The main goal is to always work with your crochet fabric.
- Mind the Gaps: Crochet is essentially a grid of interconnected loops with natural openings. Your embroidery stitches must anchor securely into the yarn fibers themselves or span across the gaps without disappearing.
- Maintain Loose Tension: This is critical. Keep your embroidery thread tension slightly looser than you would on standard fabric. Pulling too tightly will cause the crochet piece to pucker and lose its shape.
- Use the Right Needle: A standard sharp embroidery needle will split and snag your yarn. A blunt-tipped tapestry needle is essential; it's designed to glide smoothly between yarn fibers instead of piercing them.
Why a Stabilizer Is Essential
A stabilizer is a backing material that provides a more stable surface for stitching. For crochet embroidery, it is a game-changer. It prevents your stitches from sinking into the holes and stops the fabric from stretching out of shape as you work.
Pro Tip: Using a water-soluble stabilizer is like having a magic canvas. You can draw your design directly onto it, stitch through both the stabilizer and your crochet, and then simply wash it away. All that's left behind is your perfect embroidery.
This technique is especially useful for detailed designs or when working on projects with a lacy, open weave. For beginners, it removes guesswork and helps achieve a clean, professional-looking result from the start.
If you're new to yarn crafts, our guide on how to crochet for beginners is an excellent starting point.
Essential Tools and Materials
Setting up your workspace correctly is crucial for a successful and enjoyable creative session. The open, loopy nature of crochet requires a few specific tools that differ from a standard sewing kit. Don't worry, you don't need a whole new craft room! Just a few key items will make your stitches look clean, professional, and secure.

Needles and Threads
The right needle and thread are foundational to your success.
- Needle: A blunt-tipped tapestry needle with a large eye is non-negotiable. A sharp needle will split yarn fibers, creating a fuzzy mess. A tapestry needle glides smoothly between the yarn strands.
-
Thread: Your choice of thread will significantly impact the final look.
- Six-Strand Embroidery Floss: The classic choice. It's available in a vast array of colors and allows you to control line thickness by using one to six strands.
- Fine-Weight Yarn: Using a thinner yarn (e.g., fingering or sport weight) to embroider on a thicker crochet piece (e.g., worsted weight) creates a wonderful, chunky texture that feels more integrated.
A thread weight chart can help you visualize how different thread thicknesses will appear on your project.
The Secret Weapon: Stabilizers
A stabilizer is the key to embroidering on crochet. It acts as a temporary solid surface over your work, covering the gaps in the crochet stitches and providing a smooth canvas.
- Water-Soluble Stabilizer: This is the top recommendation for beginners. You draw your design on it, stick it to your crochet, and stitch through both layers. Afterward, a rinse in water dissolves the stabilizer, leaving only your stitching.
- Fusible Interfacing: For projects needing permanent support, like a patch on a bag, a lightweight fusible interfacing on the back adds structure and prevents stretching.
To Hoop or Not to Hoop?
In traditional embroidery, a hoop is essential. With crochet, the decision is more nuanced.
| Project Type | Hoop Usage | Rationale |
|---|---|---|
| Flat Items (blankets, scarves) | Yes, carefully | A hoop helps maintain even tension. Do not overtighten, as this can crush or distort crochet stitches. |
| 3D Items (amigurumi, hats) | No | It's often impossible to fit a hoop on a shaped item. A good stabilizer is crucial for support in these cases. |
This hybrid craft is increasingly popular. A 2026 wellness study found that crafts combining crochet and embroidery reduced anxiety in teens by 37%. With 73% of respondents finishing their project in one weekend, it's a deeply satisfying hobby.
Getting all your materials together in one go is half the battle. This is why all-in-one kits are so brilliant—they remove the guesswork and let you dive straight into the creative part.
To see what a complete setup looks like, review our guide to the best embroidery kits for beginners.
Prepping Your Crochet and Transferring the Design
Proper preparation is the secret to making your embroidery look professional and integrated. A few minutes of prep work will prevent common issues like puckering or a distorted pattern.
First, blocking your crochet piece, especially flat items like blankets, is highly recommended. Blocking involves wetting the piece, gently pinning it to its ideal shape, and letting it dry. This process relaxes the yarn fibers, evens out stitch tension, and creates a perfectly flat, stable surface for embroidery.
Design Transfer Methods
Once your piece is blocked, you need to transfer your design onto the crochet fabric.
The Water-Soluble Stabilizer Method
This is the top choice for beginners and detailed designs. This material is a thin sheet that you can draw or print a design on.
- Peel off the backing and stick it onto your crochet piece.
- The stabilizer creates a smooth, solid surface that bridges the gaps in the crochet.
- Stitch your design by following the lines you drew.
- Once finished, rinse the piece in warm water to dissolve the stabilizer, leaving only your stitches.
Other Transfer Techniques
Different projects may call for different methods.
| Transfer Method | Best For | How It Works |
|---|---|---|
| Water-Soluble Stabilizer | Detailed or complex patterns | Draw/print on the stabilizer, stick it on, stitch over it, then dissolve with water. |
| Waste Canvas | Cross-stitch or grid-based designs | Baste the gridded canvas onto your crochet, complete your stitches using the grid, then pull out the canvas threads. |
| Paper Template | Simple, bold shapes (e.g., a heart) | Pin a paper cutout of your shape onto the crochet and use it as a stencil, stitching around the edges. |
Tips for a Flawless Transfer
A little care during the transfer process will save you from frustration later.
- Test Your Pens: Before drawing on the stabilizer, test your marker on a corner to ensure it won’t bleed when wet.
- Consider Gauge: A design that looks perfect on paper might be too crowded on your crochet fabric. Looser stitches look best with bolder, simpler embroidery.
- Find Your Center: Measure to find the true center of your crochet piece before placing your design. Use pins to secure your guide so it doesn't shift while you work.
Remember, your transfer is the roadmap for your stitches. A wobbly or off-centre map will lead to a wobbly, off-centre result. Those few extra minutes you spend on prep will always pay off.
Mastering the Best Embroidery Stitches for Crochet
Now for the fun part: the stitching! While many embroidery stitches exist, some are better suited for the unique texture of crochet. The goal is to choose stitches that won't get lost in the yarn or pull the fabric out of shape. These tried-and-true stitches are reliable, look fantastic on a yarn base, and are versatile enough for any design.
Following a simple workflow—block, transfer, then stitch—is the secret to a flawless finish.
The Versatile Backstitch
If you learn just one stitch for outlining, make it the backstitch. It creates a solid, clean line perfect for defining shapes, lettering, or line art. It’s ideal for adding faces to amigurumi.
- Technique: Bring your needle up a short distance from your starting point, then go back down at the start. For the next stitch, come up further along the line and bring the needle back down into the same hole where your last stitch ended.
- Crochet Tip: Try to stitch in the "valleys" between crochet stitches to keep lines straight. Do not pull too tightly to avoid puckering.
The Smooth Satin Stitch
For filling shapes with solid color, the satin stitch is your go-to. It involves creating a series of straight stitches side-by-side until an area is filled.
- Technique: Place stitches as close together as possible. Avoid bringing the needle up and down in the same spot to prevent stretching the yarn. Maintain even tension so stitches lie flat.
- Crochet Tip: A water-soluble stabilizer is essential for achieving a smooth, satin-like finish on crochet, as it prevents stitches from sinking.
The Charming French Knot
For adding texture and small dots, nothing beats the French knot. They are perfect for flower centers, eyes on plushies, or adding sprinkled texture.
- Technique: Bring your needle up, wrap the floss around the needle once or twice (more wraps = bigger knot), and poke the needle back down right next to where you came up.
A 2026 California Artisan Report noted that 78% of hobbyists surveyed were adding embroidery to crochet work. This trend generated $142 million in retail sales. You can discover more insights about the cultural and economic impact of crochet and its evolution.
The Simple Lazy Daisy
The lazy daisy stitch (detached chain stitch) is the easiest way to make flower petals or leaves.
- Technique: Make a loop with your thread and secure it at the top with a tiny anchoring stitch. Group several in a circle with a French knot in the middle to create a flower.
- Crochet Tip: This self-contained loop sits nicely on top of the fabric without sinking.
Recommended Stitches for Common Tasks
| Embroidery Task | Recommended Stitch | Why It Works on Crochet |
|---|---|---|
| Outlines and Lettering | Backstitch | Creates a strong, solid line that stands out against the textured yarn. |
| Filling in Shapes | Satin Stitch | Provides excellent, smooth coverage when used with a stabilizer. |
| Textural Dots and Eyes | French Knot | Adds a beautiful 3D pop of texture that stays secure in the yarn. |
| Simple Petals and Leaves | Lazy Daisy | The looped shape sits nicely on top of crochet fabric without sinking in. |
With these four stitches, you have all you need to start embellishing your crochet projects. To take your skills further, check out our guide on how to make embroidered patches.
Troubleshooting and Finishing Techniques
Even with perfect prep, you might encounter a few issues. This is normal and part of the learning process. Here’s a guide to fixing common hiccups.
One frequent challenge is finding the right tension. If stitches are too loose, they can disappear into the crochet fabric. If they're too tight, the fabric can pucker.
Tackling Common Stitching Problems
-
Problem: My thread is disappearing!
- Cause: Loose tension or thread that is too thin.
- Solution: Use more strands of floss (up to six), switch to a thicker thread like pearl cotton, or use a stabilizer to provide a solid surface.
-
Problem: My project is puckering.
- Cause: Stitches are pulled too tight.
- Solution: Remember to lay stitches gently on top of the crochet. Use a stabilizer or a loosely-tightened embroidery hoop to provide structure and prevent bunching.
-
Problem: My design looks warped.
- Cause: Uneven tension or improper pattern transfer.
- Solution: Ensure your crochet piece is blocked flat before starting. Use a water-soluble stabilizer to keep the pattern perfectly in place.
How to Undo a Mistake
Don't panic if you make a mistake. Unpicking stitches from crochet requires patience.
Pro Tip: Think of it like delicate surgery. Use the tip of your needle to carefully cut the embroidery thread on the back of your work. Then, gently pull the loose threads out from the front, one stitch at a time.
Professional Finishing Touches
A few final steps will give your project a polished look.
- Secure Loose Ends: Weave the tails of your embroidery thread under several stitches on the back, changing direction once or twice to lock them in. Snip the excess thread.
-
Wash Your Piece: A gentle hand wash helps embroidery stitches relax and settle into the crochet fabric.
- Soak for 15-20 minutes in cool water with a drop of mild soap.
- Gently squeeze out the water (never wring) and rinse.
- Roll the item in a towel to blot excess water, then lay it flat to dry.
Ready to put your new skills to the test? Check out our beginner-friendly kits at Stitch Mingle:
- Get started with our complete Crochet Kits for Beginners.
- Find your next project among our popular DIY Bag Kits.
- Add a custom touch with our unique Embroidered Patches.
Beginner Project Ideas to Get You Started

The best way to master embroidering on crochet is to dive into a quick and satisfying project. Small successes build confidence. Simple designs can have a big impact—a single initial can turn a plain blanket into an heirloom, and a few lazy daisy stitches can transform a granny square into a floral coaster.
Perfect Projects for Your First Stitches
Start with something small to get a quick sense of accomplishment.
- Monogram a Blanket Corner: Use a backstitch to add an initial to the corner of a blanket.
- Embellish a Granny Square: Stitch a small flower or geometric design in the centre of a granny square.
- Personalize a Beanie: Add scattered French knots or a small star to the cuff of a crocheted hat.
My first project was adding a simple sleepy face to an amigurumi ball. Two curved lines and a 'v' for a mouth. Seeing that character come to life was the moment I fell in love with this craft combination.
Bridge the Gap With a Kit
A project kit is a foolproof way to start, as it includes all necessary materials.
- Customize one of Stitch Mingle’s DIY Bag Kits by adding a small embroidered crochet patch.
- Practice on our Puppy/Bear keychain kits. They are small and perfect for adding eyes, a nose, or a heart.
For more ideas, our guide on how to make embroidered patches has plenty of inspiration.
A Few Final Tips and Common Questions
Here are answers to some of the most common questions about embroidering on crochet.
Can You Embroider on Any Crochet Project?
Yes, but the texture matters. For beginners, a tight, dense fabric like single crochet is ideal as it provides a stable canvas. For lacy or open-weave projects, a stabilizer is essential to prevent stitches from getting lost and to maintain the fabric's shape.
What's the Best Thread or Yarn to Use?
This depends on your desired look.
- For fine details: Use classic six-strand embroidery floss.
- For a chunky, integrated look: Use a yarn that is thinner than the yarn used for the crochet project itself (e.g., sport weight yarn on a worsted weight blanket).
How Do I Stop My Work From Puckering?
Puckering is caused by pulling embroidery stitches too tight. Maintain a light, even tension. Using an embroidery hoop (loosely) or a stabilizer can also help keep the fabric firm and prevent distortion.
Ready to put these tips into practice? The easiest way to get started is with a kit that has everything you need.
- Take a peek at our complete collection of Stitch Mingle DIY Kits.
- Find the perfect weekend activity with our Crochet Kits for Beginners.
- Add a personal touch with our Custom Embroidered Patches.
- Learn how to make embroidered patches from scratch.
- Brush up on the basics with our guide on how to crochet for beginners.