
Making a keychain is one of those wonderfully simple and satisfying crafts. You get to play with materials like leather, plastic, or fabric, attach some cool hardware, and walk away with a finished accessory in just a couple of hours. Whether you start with a beginner-friendly kit or dream up a custom design, it's a fantastic way to create something tangible and fun.
Discover the Fun of DIY Keychain Making
Welcome to the wonderfully creative world of keychain making! If you've ever wanted to dip your toes into crafting and make something completely your own, you've come to the right place. We're going to explore why this little hobby is so rewarding—from the simple joy of creating a personalized gift to finding a perfect, screen-free way to unwind.
This guide is built for absolute beginners. I'll walk you through how to transform simple materials into charming accessories you’ll be genuinely proud of. We'll start with a couple of my favourite accessible methods: a polished-looking leather kit and a playful plastic canvas design. Trust me, your first project is going to be a success.
Why Start with Keychains?
Honestly, keychain making is the perfect gateway into the bigger world of DIY. The projects are small, so you can finish one in a single afternoon. That quick win gives you an amazing sense of accomplishment and really builds the confidence you need to tackle more ambitious crafts later on.
Think of it as your roadmap to creating beautiful, professional-looking keychains that are perfect for gifting, keeping, or even selling. The skills you'll pick up, like basic stitching or hardware assembly, are foundational building blocks for so many other projects down the line.
Handmade goods are more popular than ever, and there's a huge community of crafters out there. In California alone, the crafting industry has seen incredible growth. In fact, arts and design-related jobs are projected to grow by 12.5% between 2022 and 2030. This trend just shows how much people value unique, personalized items that have a real story behind them. If you're curious, you can learn more about California's employment projections in creative fields and see just how much this whole sector is booming.
Before we dive into the step-by-step tutorials, here’s a quick overview of the different methods we’ll be covering. This table should help you figure out which project is the best fit for your time, skills, and the supplies you have on hand.
Keychain Crafting Methods at a Glance
| Method | Best For | Average Time | Key Supplies |
|---|---|---|---|
| Leather Kit | A polished, professional look with minimal fuss. | 30-60 minutes | Pre-cut leather, needle, thread, hardware. |
| Plastic Canvas | Fun, colourful designs and a great project for kids. | 1-2 hours | Plastic canvas, yarn, tapestry needle, scissors. |
| Embroidered Patch | Upcycling patches into a quick, no-sew accessory. | Under 15 minutes | Patch, felt, strong glue, keychain hardware. |
| Shrink Plastic | Creating custom, hand-drawn charms. | 45-60 minutes | Shrink plastic sheets, markers, oven, hole punch. |
Each of these methods offers a unique creative path. Whether you prefer the classic feel of leather or the nostalgic fun of shrink plastic, there’s a project here for you.
What You Will Learn in This Guide
I’ve designed this guide to be as smooth and enjoyable as possible. You don't need a single bit of prior experience—just a little enthusiasm to get started!
Here’s a sneak peek at what we'll cover together:
- Your Essential Toolkit: We’ll break down exactly what you need, with a big focus on beginner-friendly kits that come with everything included. No guesswork!
- Step-by-Step Projects: I'll guide you through making a sophisticated leather keychain and a vibrant plastic canvas one, with clear, easy-to-follow instructions.
- Personalization Tips: This is the fun part! I’ll share some ideas for adding initials, cool charms, and other unique touches to make your keychain truly one-of-a-kind.
- Gifting and Selling: We’ll even touch on how to package your finished keychains beautifully for gifts or maybe even turn your new hobby into a small side hustle.
Getting Your Keychain Making Toolkit Ready
Alright, before we jump into the fun of actually making something, let's talk about getting your supplies in order. A little bit of prep work now will save you a ton of headaches later, trust me. Think of this as your friendly checklist to make sure you have everything you need for each project, without feeling like you need to buy an entire craft store.
Having everything laid out and ready to go means you can lose yourself in the creative flow instead of stopping every five minutes to search for your scissors. For anyone just starting out, this is probably the most important step. It sets you up for a great, frustration-free session, which is exactly what you want when you're trying a new hobby.
Why a Crafting Kit Is Your Best Friend
If this is your first time making something like a leather keychain, I honestly can't recommend a kit enough. An all-in-one kit is practically a guaranteed win right out of the box. You don't have to second-guess if you bought the right type of needle or if your clasp will actually fit the leather piece. It’s all pre-cut, pre-matched, and ready to go.
It just removes all the guesswork. It’s like having an experienced crafter hand-pick the perfect materials for you, ensuring you end up with a polished, professional-looking keychain, even if you’ve never stitched anything in your life.
This lets you focus on the actual skills—like learning a saddle stitch—instead of getting bogged down in the prep. If you want to see what a complete setup looks like, a leather crafting key chain DIY kit is a perfect example of a project that bundles everything together for you.
What’s Inside a Leather Keychain Kit
When you open up a good leather keychain kit, you'll find a small, thoughtfully chosen collection of materials. Every single item is there for a reason and makes the whole process feel incredibly simple and satisfying.
Here’s what you’ll almost always find inside:
- Pre-cut Leather Pieces: These are already cut to the perfect shape, which saves you the hassle of trying to cut through thick material. The best part? The stitching holes are often pre-punched, making sewing a breeze.
- Waxed Thread: This stuff is much tougher than regular sewing thread. It’s coated in wax, which helps it glide smoothly and keeps your stitches tight and secure. No frustrating tangles!
- Leather Needles: You'll notice these have a bigger eye (for easier threading) and a blunt tip. They're designed to pass through the pre-punched holes without accidentally splitting the leather.
- Keychain Hardware: This is all the metal stuff—the key ring itself, plus any clasps or rivets needed to finish the job. It's always perfectly matched to the style of the project.
Honestly, with a kit like this, the only other things you'll probably need are a pair of scissors for snipping thread and a clean, well-lit table.
Supplies for a Colourful Plastic Canvas Project
Now, if you're more drawn to the bright, pixel-art vibe of plastic canvas, your shopping list will look a bit different but is just as straightforward. This is such a fun medium with tons of room for creativity.
Here are the essentials you'll want to grab:
- Plastic Canvas Sheets: These come in different sizes, but a 7-count sheet (meaning 7 holes per inch) is the sweet spot for beginners.
- Yarn: Your standard worsted-weight acrylic yarn is perfect. It's affordable, comes in a rainbow of colours, and fills the canvas holes beautifully.
- Tapestry Needle: Look for a needle with a big eye and a blunt tip. It makes it super easy to weave through the canvas holes without snagging or splitting your yarn.
- Sharp Scissors: A good pair is a must for getting clean cuts on both your yarn and the plastic canvas itself.
- Keychain Hardware: A simple split ring or a lobster clasp is all you need to turn your little creation into a functional keychain.
Alright, let's get into the good stuff—making your very first leather keychain. I'll be walking you through this using a standard beginner's kit as our guide. Think of me as your crafting partner, here to turn what might look a little complicated into something surprisingly simple and fun.
There's just something special about working with leather. It's tough, looks fantastic, and is actually quite forgiving for a first-timer. The best part about using a kit is that it skips all the intimidating stuff, like trying to cut through thick hide or guessing which hardware will fit. You get to dive right into the satisfying part: stitching and putting it all together.
This little diagram gives you a quick visual of how a kit takes you from unboxing to having your tools ready to go.
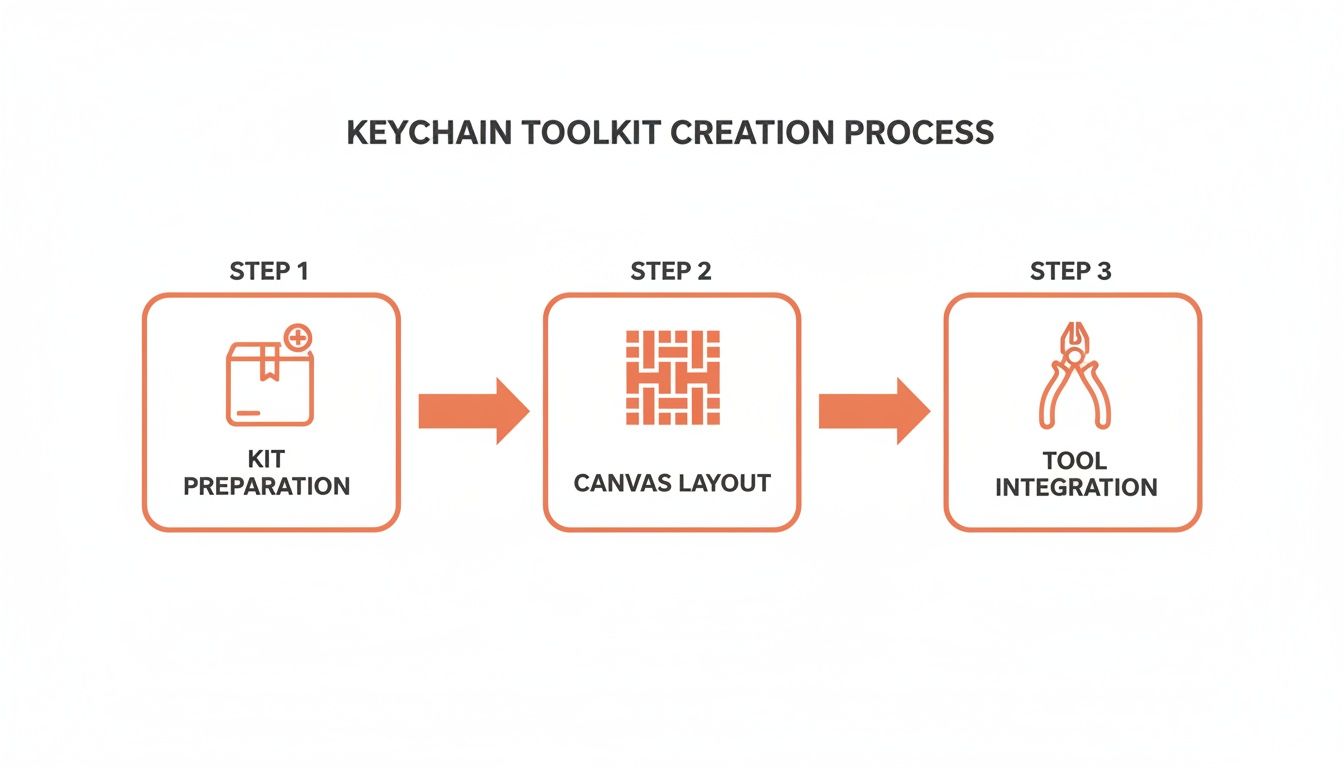
It really shows how having everything you need in one box makes the whole process smoother and way more enjoyable.
Getting Your Workspace and Materials Sorted
First things first, clear a space. A clean, well-lit tabletop is perfect. I always put down a cutting mat or even just a piece of cardboard to protect my table from any accidental scratches.
Now, open up your keychain kit and lay everything out. Take a second to get familiar with all the bits and pieces. You’ll see your pre-cut leather shapes, a spool of waxed thread, a couple of needles (they should have blunt tips), and the metal keychain hardware. Knowing what's what before you start makes everything flow much better.
Go ahead and pull off a good length of thread. A great rule of thumb is to measure out about four times the length of the seam you're about to sew. It will look like way too much, but trust me, it’s much better to have extra than to run out halfway through. One of the most common mistakes I see beginners make is cutting the thread too short, which forces you to tie an awkward knot in the middle of your beautiful stitch line.
Nailing the Saddle Stitch
The saddle stitch is the absolute bedrock of handmade leather goods. It looks fancy, but it's really just a simple technique using two needles that creates an incredibly strong seam. Here’s the cool part: unlike a stitch from a sewing machine, a saddle stitch won’t unravel even if one of the threads happens to break.
Here’s the rhythm you’ll get into:
- Thread Your Needles: Start by threading a needle onto each end of that long piece of thread. No knots needed!
- The First Plunge: Push one needle through the very first pre-punched hole. Pull the thread so you have the same amount on both sides of the leather. You should now have one needle on the front and one on the back.
- Creating the Lock: Take the needle from the back and push it through the second hole to the front. Now, before you pull it tight, guide the front needle through that exact same hole to the back. The trick is to make sure the second needle passes through the loop created by the first thread.
- Cinch it Down: Gently pull both needles at the same time to tighten the stitch. You want it to be firm and snug, but not so tight that it makes the leather pucker.
Just repeat that pattern for every hole. It'll feel a bit clumsy for the first few stitches, but you'll find your groove pretty quickly. This is the stitch that gives handmade leather its signature professional look and durability.
Here's a pro tip for a super clean stitch line: Always be consistent. For example, decide that you'll always bring the back needle through the hole first, then the front needle. Sticking to the same order every single time is the secret to getting that perfectly straight, even stitching you see on high-end goods.
Putting It All Together
Once you've stitched all the way to the end, it's time to lock it in and add the hardware. We want this keychain to last, so a simple knot won't do.
To properly finish the seam, you'll want to backstitch. This just means stitching backward over the last two or three stitches you made, using the same holes. It's like putting your sewing in reverse, and it locks the thread in place far more securely than a knot. Once you've done that, you can snip the leftover thread as close to the leather as you can. For extra peace of mind, you can add a tiny, invisible dab of clear glue on the ends.
Last but not least, the hardware! Your kit will have a key ring and probably a rivet or clasp. The instructions will show you how to attach it, which usually involves just looping the leather tag through the ring and securing it. If it’s a screw-in rivet, make sure you tighten it down nice and firm.
And that's it! Take a step back and check out what you made. You've just created a stylish, durable accessory with your own two hands. Those tiny imperfections? That’s character, and it’s proof that it wasn't stamped out by a machine.
This kind of hands-on project is getting more and more popular. Market reports show that North America is a huge player, making up 42% of the $2.1 billion global keychain market, with personalized crafts leading the charge. Here in Canada, and across North America, all-in-one kits are a hit because they help people finish what they start. It's a great feeling, and your new keychain is a perfect example of why these kits work so well. If you're curious, you can discover more insights about the keychain market and see just how big this trend has become.
Making a Colourful Plastic Canvas Keychain
Ready for a pop of colour? Let’s dive into the vibrant and surprisingly simple world of plastic canvas keychains. If you have a soft spot for needlepoint or just want a playful project without a steep learning curve, you're in the right place. This craft has a charming, almost pixelated look that’s perfect for stitching up initials, tiny hearts, or even your favourite retro video game characters.
The whole idea here is a low-pressure, enjoyable craft. For busy folks, especially those in the 30-50 age range, plastic canvas kits are a dream. You can knock out a satisfying project in just 1-2 hours, turning a lazy weekend afternoon into a finished, giftable item. That speed and simplicity are a huge part of the appeal. It's just a fantastic way to experience the joy of making something bright and personal from scratch.
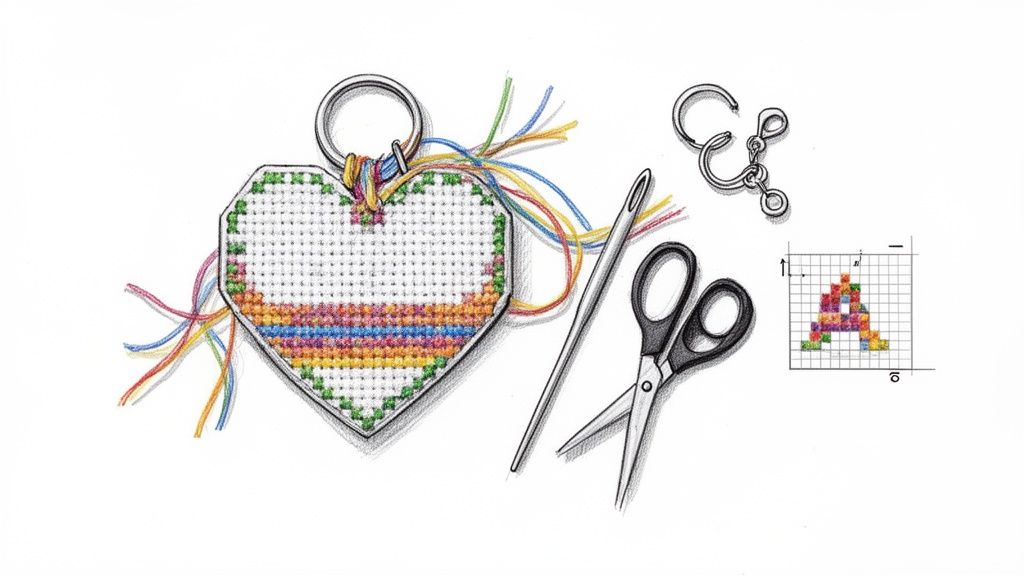
Prepping Your Plastic Canvas Project
First things first, let's pick a simple design. Think about what will look good on a small scale. An initial is a classic choice, and so are simple shapes like a heart or a star. Before you make a single cut, try sketching your idea on graph paper. This little bit of planning helps you see how it’ll translate to the canvas grid and lets you count out stitches before you even pick up a needle.
Once you’ve got a design you love, it's time to cut the canvas. Grab a pair of sharp, sturdy scissors and carefully cut your shape out of a sheet of 7-count plastic canvas. I always recommend cutting two identical pieces—one for the front and one for the back. This gives your keychain a much more polished and substantial feel by hiding the messy back of your stitching inside.
Here’s a little tip from experience: try to trim right along the plastic "bars" of the grid. This gives you a much smoother edge and prevents those sharp little plastic nubs that can snag on things later. A clean cut makes all the difference.
Bringing Your Design to Life with Stitches
Now for the best part—the stitching! Grab your tapestry needle and some colourful yarn. The most common and versatile stitch for this is the Tent Stitch. It’s just a simple diagonal stitch that goes over one intersection of the canvas grid. It’s quick to learn and perfect for filling in areas with solid colour.
To start, cut a length of yarn about 18 inches long. Trust me, any longer and you'll be fighting with annoying tangles. Don't tie a knot at the end. Instead, leave a short tail (about an inch) on the back of the canvas. You can secure it by simply holding it down and working your first few stitches right over it. It’s a clean little trick that keeps the back from getting bulky.
Work your design row by row, trying to keep your stitch tension consistent. You want the stitches snug enough to cover the plastic, but not so tight that they warp the canvas. This is where you can really relax and get into a nice, meditative rhythm. If you're looking for more inspiration, our shop has a fun plastic canvas bag craft kit that uses these exact same techniques.
Finishing and Assembling Your Keychain
Once you've finished stitching both canvas pieces, it’s time to put it all together. Place the two pieces back-to-back, making sure the edges line up perfectly. The "wrong" sides with all the yarn tails should be sandwiched on the inside.
To join them, you’ll use a technique called the Whipstitch. This is a simple, clean stitch that wraps around the outer edge, binding the two pieces and creating a professional-looking border.
- Get started: Begin at a corner. Pass your needle through the first hole of both layers, going from back to front.
- Wrap it around: Loop the yarn over the edge and go through the very next hole, again from back to front.
- Keep going: Repeat this motion all the way around the keychain. You'll see a neat, spiralled edge start to form.
Before you stitch the whole thing closed, don't forget to insert a small loop of yarn or a jump ring at the top corner! Stitch it securely into place with your whipstitch so you have a sturdy anchor for the keychain hardware. After you’ve stitched all the way around, secure the end by weaving it through the back of a few stitches on the inside, then snip it close.
Finally, attach your key ring, and your colourful creation is ready to go
Making Your Handmade Keychains Your Own
A handmade keychain is a lovely thing, but a personalized one? That's a real treasure. This is the fun part, where you move beyond the instructions and add a bit of yourself into the project. It’s what turns a simple craft into a truly meaningful keepsake, whether you're making it for yourself or giving it as a gift.
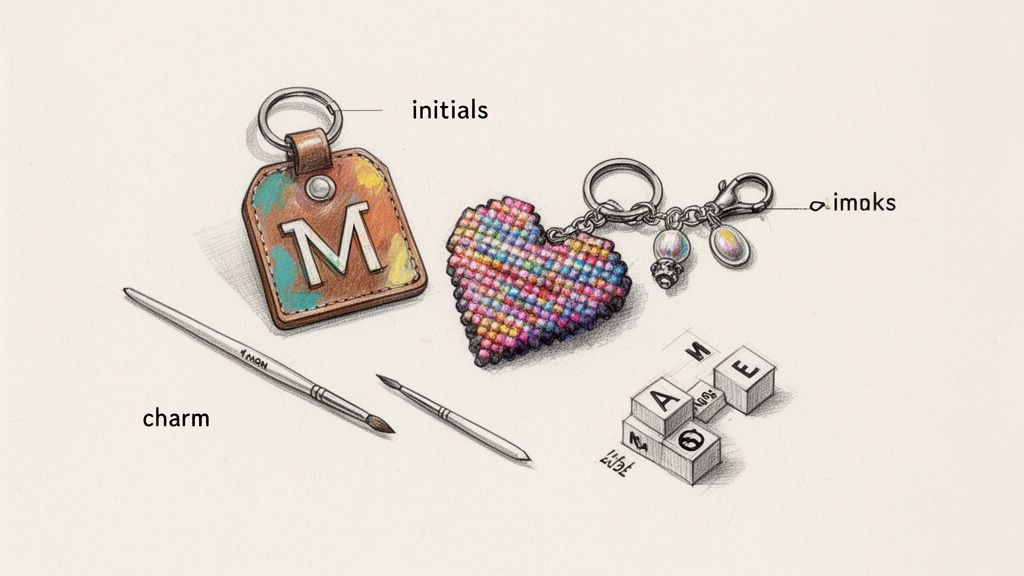
The best part? Making something unique doesn't have to be a huge effort. Sometimes, the smallest details—like painting on an initial, adding a tiny charm, or even just picking a different colour of thread—can completely change the vibe of your finished piece. Think of this as your brainstorming corner, packed with ideas to help you create something that’s one-of-a-kind.
Playing with Leather
Leather is such a fantastic material—it’s classic, durable, and surprisingly easy to customize. Its smooth surface is basically a blank canvas waiting for your creative touch.
- Paint & Pens: Grab some fine-tipped acrylic paint pens to draw on initials, a special date, or a simple design. I find that gold or silver pens really pop and add a touch of class.
- Simple Tooling (No Fancy Tools Needed!): You don't need a professional set to make an impression. You can gently press the end of a blunt nail or a small flathead screwdriver into the leather to create subtle lines and dots for a custom pattern.
- Charm It Up: This is the easiest trick in the book! Just attach a small metal charm to the key ring that reflects a hobby, a passion, or an inside joke.
I've always found that the best way to make a project feel special is to make it uniquely identifiable. A simple monogram or a custom tag instantly elevates your craft from a DIY project to a cherished personal accessory.
Putting Your Stamp on Plastic Canvas
Plastic canvas is all about colour and pattern, which makes it incredibly fun to personalize. Even a tiny change to your stitching plan can make a huge difference.
Instead of sticking to a solid colour, why not try a variegated yarn? This is one of my favourite shortcuts. The yarn has multiple colours dyed along a single strand, so it creates a gorgeous, self-striping effect as you stitch. It’s a super simple way to get a complex-looking design with zero extra effort on your part.
Another fantastic idea is to chart out your own custom pattern. Just grab some graph paper and sketch out a friend's initial or a little symbol that means something to them. The squares on the paper correspond directly to the stitches on your canvas, giving you a perfect roadmap for your design.
Quick & Easy Customization Hacks
Sometimes you just want to add that personal flair without a ton of extra work. Pre-made elements are your best friend here, instantly giving your keychain a bespoke feel.
An embroidered patch featuring a favourite quote or image can be glued onto a felt backing and attached to a key ring. It’s a brilliant no-sew option that takes less than 15 minutes. For an even more polished look, a stylish name tag can be a game-changer. Our colourful custom name tags, for example, are designed to be attached in a snap, giving your keychain a professional finish.
Now that you've got some ideas, it's time to explore the different ways you can add that personal touch, no matter which keychain style you've chosen.
Personalization Ideas for Different Keychain Types
Here's a breakdown of creative ways to add a personal touch to your handmade keychains, tailored to the material you're using.
| Keychain Type | Beginner Idea | Intermediate Idea | Stitch Mingle Product Tip |
|---|---|---|---|
| Leather Kit | Use a gold or silver paint pen to add a single initial. | Try simple leather stamping with a single letter stamp. | Add one of our metal monogram charms to the key ring. |
| Plastic Canvas | Stitch the design using variegated yarn for a multi-colour effect. | Create a custom pixel-art design on graph paper first. | Use our vibrant custom name tags for a polished finish. |
| Embroidered-Patch | Choose a patch that represents a hobby or inside joke. | Add a few hand-stitched details around the patch border. | Attach a pre-made tassel alongside the patch for extra flair. |
| Shrink Plastic | Trace a simple line drawing of a pet or favourite flower. | Create a multi-layer design with two pieces of shrink plastic. | Use our fine-point permanent markers for crisp, clean lines. |
With these ideas as a starting point, you can move beyond any standard kit and start crafting keychains that really tell a story. Don't be afraid to experiment with different colours, textures, and add-ons—that’s where the magic happens
So, You're Thinking of Selling Your Keychain Creations?
After you’ve whipped up a few keychains you’re genuinely proud of, that little voice might pop into your head: "Hey, I could probably sell these." It's a really exciting thought! Turning a creative outlet into a little side hustle is totally doable, and you don't need a massive investment to get started.
The trick is to ease into it. Don't feel pressured to build a huge inventory right away. Instead, focus on creating a small, well-crafted collection of your absolute favourite designs. This lets you test the waters, see what people are drawn to, and learn as you go without getting swamped.
How Much Should I Charge?
Figuring out pricing can feel like a bit of a dark art, but a simple formula will give you a solid starting point. First, add up the cost of every single piece that goes into one keychain—the leather, the thread, the hardware, you name it. Then, decide what your time is worth and track how long it takes you to make one from start to finish.
Here’s a simple way to calculate it:
- Cost of Materials + (Your Hourly Rate x Hours to Make) = Your Base Price
Let's say your materials cost $3, and it takes you about 30 minutes to make a keychain. If you value your time at $20 an hour, your formula would look like this: $3 + ($20 x 0.5) = $13. From there, you can browse around online marketplaces or local shops to see what similar handmade keychains are going for and adjust your price if needed.
Taking Photos That Actually Sell
Amazing photos are your secret weapon. Seriously, you don't need a professional camera—your smartphone can do an incredible job. The single most important element is good lighting. Find a spot near a window on a day that’s a little overcast; this gives you soft, even light without any harsh shadows.
Your best friend here is a clean, uncluttered background. A simple white poster board, a rustic piece of wood, or even a neutral-coloured piece of fabric will make your keychain pop and let the craftsmanship speak for itself.
Be sure to get a few different shots. A close-up is great for showing off the tiny details, like your perfect stitching. Then, snap a "lifestyle" photo—maybe with the keychain hanging from a set of keys or clipped to a backpack. This helps people imagine it in their own lives, which is a huge step toward making a sale.
Where to Set Up Shop
With your keychains priced and photographed, it’s time to find them a home. There are a few fantastic options for anyone just starting out, each with its own vibe.
You could try:
- Online Marketplaces: A platform like Etsy is built for artisans and crafters. It comes with a ready-made audience of people who are specifically looking for unique, handmade goods.
- Social Media: Setting up shop on Instagram or Facebook Marketplace is a great way to sell directly to your followers and local community. It feels personal and direct.
- Local Craft Fairs: There’s nothing quite like selling in person. Craft markets let you connect with customers face-to-face, get instant feedback, and become part of a local creative community.
My advice? Just pick one to start. It’s much easier to get your footing and build some momentum before trying to be everywhere at once. You can always expand later on
Your Keychain Questions, Answered
Jumping into a new craft always comes with a few questions, and that's a good thing! It means you're really thinking about the project. I've put together some answers to the most common questions I hear from crafters who are just getting started with making keychains.
Think of this as a little cheat sheet to help you sidestep any tricky spots so you can focus on the fun. Getting these details sorted out first will make your whole crafting session go a lot smoother.
What’s the Easiest Keychain to Make if I’m a Total Beginner?
Hands down, the easiest way to start is with an all-in-one kit. I always recommend a leather keychain kit for first-timers because everything is pre-cut and ready to go. You get the leather pieces, the hardware, and clear instructions, so there's no guesswork involved. You can just dive right into the creative part.
This pretty much guarantees you’ll end up with something that looks polished and professional on your very first try. If you're more of a yarn person, a simple plastic canvas project is another fantastic, low-stress choice that gives you a colourful and satisfying result.
Where Should I Look for the Best Keychain Hardware?
Good hardware is what takes a keychain from "homemade" to "handmade." It makes a huge difference in how your project looks and how long it lasts. You can find key rings, clasps, and rivets at most craft stores or online, but the quality can really be all over the map.
For a sure thing, a complete kit is a great bet because you know the hardware was picked specifically for that project. If you're buying your own, keep an eye out for sturdy metals like nickel-plated steel or solid brass. They’re much better at resisting tarnish and won't break on you after a week of use.
My Two Cents: Never skimp on the hardware! A strong clasp and a solid ring are the final touches that make your keychain feel durable enough for everyday life. It’s a small detail that has a huge impact on your finished piece.
How Long Does It Actually Take to Make One Keychain?
This really depends on the project's complexity, but the great news is that most beginner keychains are super quick to make! You can easily finish a simple leather keychain from a kit in about one to three hours. It's the perfect way to spend a lazy weekend afternoon.
A plastic canvas keychain is right in that same ballpark, usually taking about one to two hours from the first stitch to the last. Honestly, that’s one of the best things about making keychains—you get that awesome feeling of accomplishment pretty fast, which keeps you excited to make the next one.
Ready to start a project where everything you need is right in the box? Check out the beginner-friendly DIY kits over at Stitch Mingle. You’ll see just how easy it is to create something you’re proud of. Find your perfect keychain kit today at https://stitchmingle.com.
Composed with Outrank tool
