
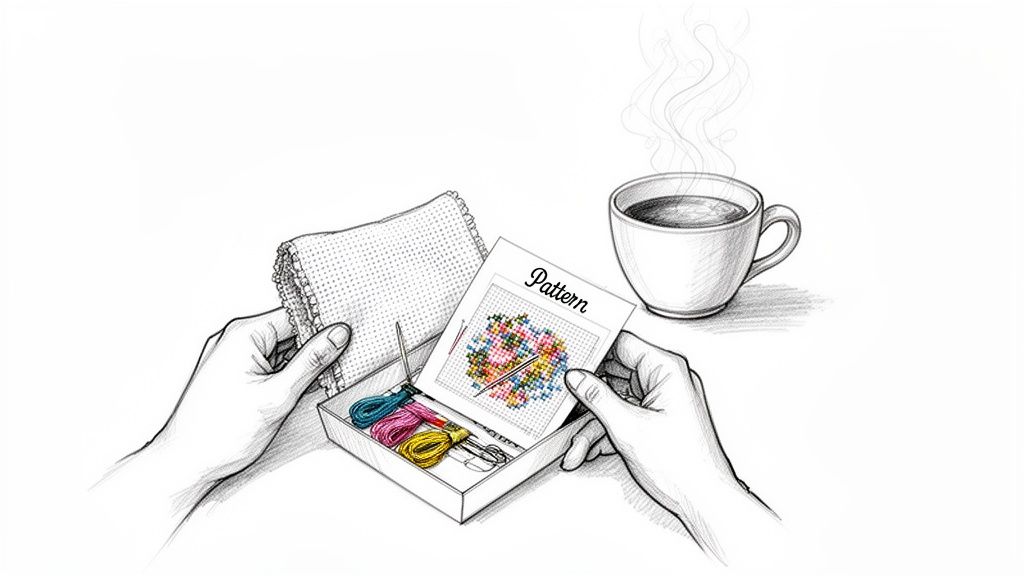
Ready to dive into a new hobby that’s as calming as it is creative? Cross stitch kits are your all-in-one ticket to this wonderfully relaxing, screen-free craft. They come packed with everything you need—the fabric, thread, needle, and pattern—to create something beautiful from scratch.
Welcome to the Relaxing World of Cross Stitch
If you're searching for a way to slow down and make something with your own two hands, you’ve come to the right place. Cross stitch is a beautifully simple type of embroidery where you make tiny, neat X-shaped stitches that come together to form a picture. It’s a lot like painting by numbers, but with a needle and thread instead of a brush.
There's something incredibly calming about the gentle, rhythmic motion of pulling the floss through the fabric. It's a fantastic way to practise mindfulness and melt away stress. So many stitchers find it helps them unplug from the pressures of the day and just get lost in the simple joy of creating.
Your Creative Journey in a Box
The best part about starting out? Modern cross stitch kits make it easier than ever. You can forget about wandering through a craft store, trying to figure out which of the dozens of supplies you actually need. A good kit takes all the guesswork out of it by bundling all the essentials together for you.
A kit isn't just a box of materials; it's a guided creative experience. Think of it as your personal roadmap, designed to take you from that very first stitch to a finished piece you can be truly proud of.
This guide is here to walk you through every step. We’ll look at what to expect inside your first kit, how to make sense of a pattern, and the basic techniques to get you stitching right away. And while cross stitch and embroidery are cousins in the craft world, they are different. You can learn more about the differences between cross stitch and embroidery in our detailed guide.
So, why is a kit the perfect place to start?
- Convenience: All the right materials are hand-picked for you, so you know everything will work perfectly together for your chosen design.
- Confidence: Kits designed for beginners are set up for success, letting you build your skills without feeling swamped or intimidated.
- Satisfaction: There's nothing quite like the feeling of finishing a project—no matter how small—and having a tangible piece of art to show for it.
Let’s get this creative journey started, shall we?
What's Inside Your First Cross Stitch Kit?
Opening your first cross stitch kit is a special kind of magic. It's like a little treasure chest packed with everything you need to start creating. All those bits and bobs might look a little confusing at first, but trust me, each one has a job to do.
The best part about starting with a cross stitch kit is that it takes all the guesswork out of the equation. You won't have to wander the aisles of a craft store wondering what to buy—it's all right there, ready for you to dive in.
Think of it as a pre-packed art box for a painter. Everything is organised so you can skip the prep and get straight to the fun part. Let's take a peek inside and see what you'll find.
Aida Fabric: Your Canvas
First up is the fabric, which in almost every beginner's kit will be something called Aida cloth. This is a fantastic cotton fabric specially woven with a grid of tiny, easy-to-see squares.
It's basically the graph paper of the sewing world. Each little square is a perfect guide for a single "X" stitch, which helps keep your work looking super neat and even. This grid is the secret weapon that makes cross stitch so welcoming for newcomers.
Embroidery Floss: Your Palette of Colours
Next, you'll see a collection of colourful threads. This is embroidery floss, and it's what you'll use to "paint" your design. The designer has already picked out every single colour you'll need to bring the pattern to life.
You'll notice the floss is usually made of six tiny strands twisted together. For most projects, you'll only use two or three strands at once. This gives you amazing control over how thick your stitches look, which is great for creating fine details. Don't worry, the kit's instructions will tell you exactly how many strands to use.
The real beauty of a kit? You get the perfect amount of every single shade. No more stressing about running out of a colour halfway through or trying to guess the right hue at the store.
The Needle and Pattern: Your Tools and Map
Of course, you can't stitch without a needle! Every kit comes with a tapestry needle. These are a bit different from regular sewing needles—they have a blunt tip and a bigger eye. The blunt end is a lifesaver because it glides smoothly through the holes in the Aida without accidentally splitting the fabric's threads.
And last but not least, you have the pattern. This is your roadmap to success. It's a chart full of symbols that shows you exactly which colour to stitch in each square. Following the pattern feels a bit like colouring by numbers or finishing a satisfying puzzle, one stitch at a time. All these pieces together create the perfect package for a fun and totally stress-free first project.
Understanding Cross Stitch Fabric and Counts
When you first dive into the world of cross stitch kits, you'll quickly run into two key terms: fabric type and "count." Think of the fabric as your canvas and the count as its resolution. Getting this part right is your first big step toward a project that’s not just beautiful, but genuinely fun to create.
So, what exactly is the "count"? It’s simply the number of stitches you can make in one inch of fabric. A lower number, like 11-count or 14-count, means the little woven squares in the fabric are bigger. This makes them a breeze to see and stitch, which is exactly why you'll find them in almost every beginner kit.
Once you’ve got a few projects under your belt, you might feel ready to tackle higher-count fabrics, like 16 or 18-count. The squares are smaller, which lets you pack in more detail for a really intricate, almost photo-like finish.
Aida: The Beginner’s Best Friend
Most cross stitch kits aimed at newcomers will come with a piece of Aida cloth, and for good reason. This fabric is the undisputed champion for anyone just starting out because its special weave creates a super clear, easy-to-follow grid. Each little square has four perfectly placed holes at the corners, giving you a perfect target for your needle every single time.
Aida fabric takes all the guesswork out of stitching. It’s like having built-in guidelines that help you create neat, even stitches from your very first project. You get a professional-looking result without the stress.
This straightforward structure is what makes cross stitch so relaxing and accessible. You can focus on bringing the colourful pattern to life instead of squinting and worrying about where your next stitch should go. It's this ease of entry that's helped fuel a huge revival in needlecrafts. In fact, the global market for needlecraft patterns was valued at around USD 1.2 billion in 2023 and is on track to more than double by 2032! You can read more about the incredible growth of the needlecraft market on dataintelo.com.
This handy diagram shows the core trio of supplies you’ll find in just about any kit.
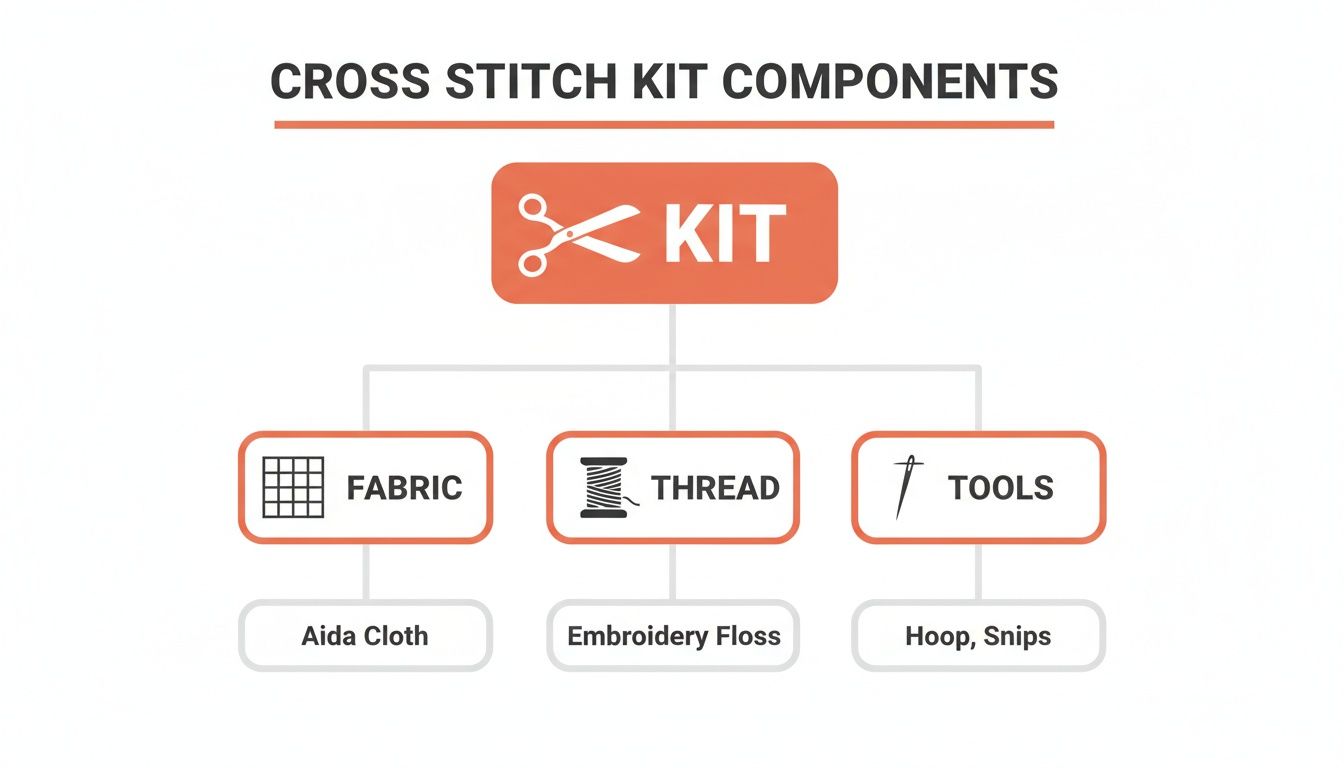
It’s this simple combination of fabric, thread, and a few basic tools that opens up a whole world of creativity.
Comparing Your Fabric Options
While Aida is the go-to for beginners, you might hear about other fabrics like Evenweave or Linen. These are lovely materials, but they’re usually better suited for stitchers with a bit more experience. They have a softer, more fluid feel, but their weave isn't as rigidly defined as Aida's, making them a little trickier to work with.
To help you see why your first kit will most likely come with a lower-count Aida, here’s a quick comparison.
Choosing Your First Cross Stitch Fabric
| Fabric Feature | 11-Count Aida | 14-Count Aida | 28-Count Evenweave |
|---|---|---|---|
| Ease of Use | Easiest | Very Easy | More Challenging |
| Holes per Inch | 11 | 14 | 14 (stitched over 2) |
| Best For | Absolute beginners, kids | Beginners, most kits | Intermediate stitchers |
| Stitch Look | Larger, blockier stitches | Standard, neat stitches | Finer, more delicate stitches |
Ultimately, picking a kit with 11-count or 14-count Aida is the best way to guarantee a smooth and enjoyable start. It lets you build confidence and get into the relaxing rhythm of stitching without any frustration, setting you up for a lifetime of happy crafting.
How to Choose the Perfect Beginner Kit
Walking into the world of cross stitch kits for the first time is a bit like stepping into a candy shop—so many colourful and exciting options! But how do you pick the one that will set you up for success instead of frustration? The secret is to start simple and choose a project that promises a quick and satisfying win.
Think of your first project as a creative warm-up. The goal isn't to stitch a massive, complex masterpiece right out of the gate. It's about learning the basic rhythm of stitching and building your confidence. A small, charming design is perfect for this, and you can often finish it in a single weekend.
Look for Simplicity in Design
When you're browsing kits, your new motto should be "less is more." A truly beginner-friendly kit has a design that’s easy to follow without feeling overwhelming.
Here’s what to keep an eye out for:
- Manageable Project Size: Look for kits that create a finished piece no larger than 5x5 inches. Smaller projects are way less intimidating and give you that wonderful feeling of accomplishment much faster.
- Limited Colour Palette: A design with fewer than ten colours is ideal. This makes it so much easier to follow the pattern and switch between floss colours without getting tangled or confused.
- Blocky Shapes, Not Fine Details: Designs with solid blocks of colour and simple outlines are a breeze to stitch compared to those with intricate details, tiny confetti-like stitches, or blended shades.
This focus on simplicity is a huge part of what makes the crafting community so welcoming. It’s a hobby that has found a massive following here in North America, where our DIY culture thrives. The regional market is projected to be worth USD 0.24 billion by 2035, which just goes to show how many people are discovering the joy of stitching! You can discover more insights about the cross stitch market trends on businessresearchinsights.com.
The Power of Clear Instructions
Beyond the design itself, the quality of the instructions can make or break your first experience. A great beginner kit goes the extra mile to support you.
A well-designed kit is like having a friendly teacher by your side. It anticipates your questions and provides clear, visual guidance, ensuring you feel supported and excited from your very first stitch to your last.
Look for cross stitch kits that include a colour-printed pattern, a clear symbol key, and ideally, access to step-by-step video tutorials. These visual aids are invaluable for learning fundamental techniques like how to start your thread or make a neat 'X.' For a deeper dive into what makes a kit great for a newcomer, check out our guide on choosing the best embroidery kits for beginners.
Ultimately, the perfect first kit is one that sparks your excitement and makes you eager to pick up your needle and thread.
A Simple Step-by-Step Guide to Your First Stitches
 Alright, this is where the real fun begins! You’ve got your kit, you know what everything does, and now it’s time to bring that beautiful pattern to life. We’ll walk through this together, breaking it down into small, easy steps so you feel confident from the very first stitch.
Think of this as a cosy, hands-on tutorial. There's absolutely no pressure here, just the simple joy of creating something one 'X' at a time. Let’s get that needle threaded and ready to go.
Preparing for Your First Stitch
Before your needle even touches the fabric, a little bit of prep work makes a world of difference. Getting everything set up now means you can settle into a smooth, enjoyable stitching session without any interruptions.
Here’s how to get everything in order:
- Prepare Your Thread: Most embroidery floss comes as a little bundle of six strands twisted together. Your cross stitch kit instructions will tell you how many to use—it's usually two. Cut a piece of floss about the length of your forearm (from your elbow to your fingertips is a good measure!), then carefully separate out the number of strands you need and thread your needle.
- Find Your Starting Point: To make sure your design ends up perfectly centred, it’s always best to start stitching from the middle of the pattern. The easiest way to find this spot is to gently fold your Aida fabric in half lengthwise, and then in half again widthwise. The corner where the folds meet is the centre of your fabric.
- Secure Your Fabric: If your kit came with an embroidery hoop, now’s the time to pop your fabric in. You want the material to be pulled taut, like a little drum. This tension is your best friend—it makes it so much easier to create nice, even stitches.
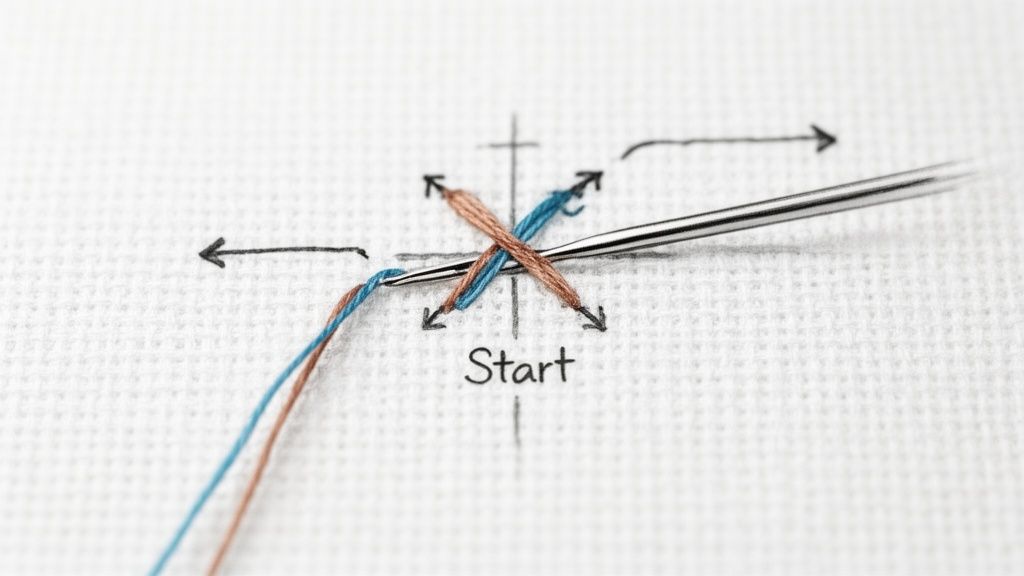
Making the Perfect Cross Stitch
The cross stitch itself is wonderfully simple. It’s just two little diagonal stitches that cross over each other to form an 'X'. The secret to a really neat, professional-looking finish is making sure all your top stitches face the same direction throughout the entire project.
There are two main ways to do this, and neither is right or wrong—it’s all about what feels best for you. The "English Method" is where you complete one full 'X' before moving on to the next one. This is great when you have single stitches of the same colour scattered around the pattern.
The real magic of cross stitch lies in its simplicity. Every complex, beautiful image is just a collection of tiny, perfect 'X's. Master this one simple stitch, and you can create absolutely anything.
The second approach is the "Danish Method," which is a game-changer for stitching rows of the same colour. You work a whole row of half stitches first (like this: ///), and then you come back along the row to complete the 'X's (like this: XXX). This method is often faster and helps keep your stitches looking incredibly uniform. Lots of stitchers also find it keeps the back of their work tidier, too!
Securing Your Thread Neatly
When you start a new colour or your thread gets a bit too short, you’ll need to secure the ends on the back of your work. The golden rule is to avoid tying knots! They can create little bumps that show through on the front of your piece.
Instead, when you begin a new thread, just leave a short tail (about an inch) on the back. As you make your first few stitches, you can catch this tail underneath them to lock it in place. To finish a thread, simply weave your needle under the last three or four stitches on the back before trimming the extra floss. This little trick keeps the back of your project looking almost as neat as the front.
Finishing and Displaying Your Creation
You did it! That final stitch is in place, and the feeling is just the best. Now comes the really satisfying part: turning your project into a polished piece of art that you can proudly show off. These last few steps are what give your creation that professional, gallery-worthy look.
Before you get to the fun of displaying it, though, it's always a good idea to give your work a gentle clean. This little bit of prep will wash away any oils from your hands and get rid of those stubborn creases left by the embroidery hoop.
Preparing Your Piece for Display
First things first, let's give your project a quick bath. Just fill a clean sink or basin with lukewarm water and a tiny drop of mild soap. Let your piece soak for about 15 minutes, then give it a thorough but gentle rinse under cool, running water.
To dry it, lay the fabric flat between two clean, fluffy towels and press down to soak up the excess water. Whatever you do, don't wring it out! While it's still a little damp, place it face-down on a fresh towel and iron it on a low setting. This is the secret to getting every wrinkle out without squishing your beautiful, plump stitches.
This final prep stage is what takes your project from a simple hobby to a handmade treasure. Taking a few extra minutes to wash and press your work makes all the difference and ensures your stitches look perfect for years.
Creative Ways to Show Off Your Work
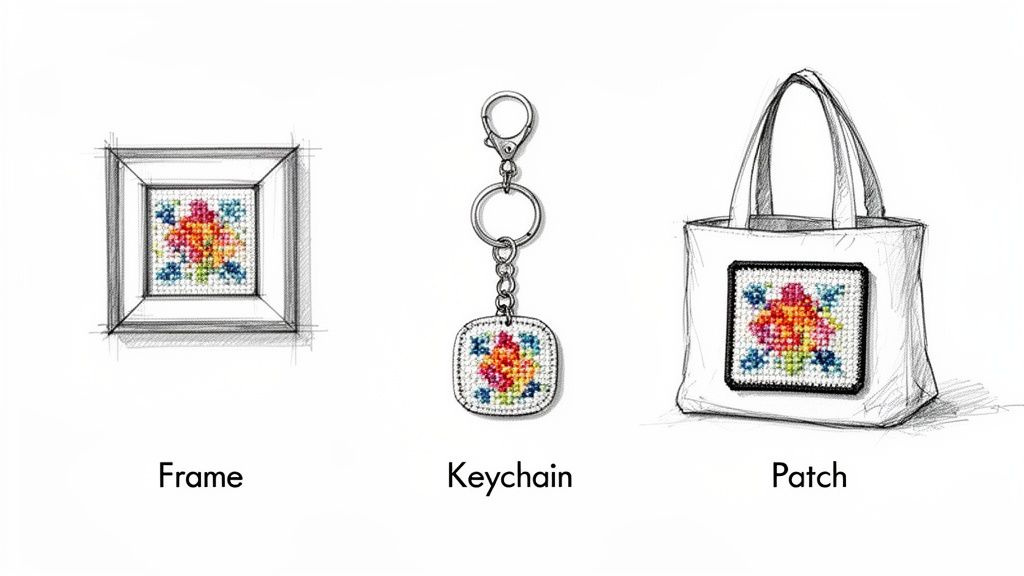
Alright, now for the best part—deciding how you're going to display your masterpiece! Framing is a classic for a reason, but so many modern cross stitch kits are designed with more creative uses in mind. Your options are practically endless.
Here are just a few ideas to get you started:
- Classic Framing: A simple wooden or decorative frame can turn your stitch work into instant wall art for your home.
- Create a Patch: Carefully trim the fabric, stick on some iron-on adhesive, and you've got a custom patch for a denim jacket or a canvas tote bag.
- Make a Keychain: Those small, adorable designs from beginner kits are just the right size for turning into keychains or bag charms.
- Decorative Ornaments: Mount your finished design in a small embroidery hoop for a charming, rustic ornament you can hang anywhere.
These finishing touches are what make each piece uniquely yours. If you're looking for more inspiration, have a look at our guide to beautiful flower designs in cross stitch and just imagine all the amazing things you could create.
Got Questions? We've Got Answers!
Every new stitcher has a few butterflies before that first stitch. Totally normal! Think of this as your personal FAQ, here to answer those last-minute questions so you can get started on your cross stitch kit feeling excited and ready.
We’ve pulled together the most common things beginners ask, so you can stitch with confidence.
"What If I Mess Up?"
First off, take a deep breath. Mistakes are not only okay, they're part of the learning process! If a stitch lands in the wrong spot, you can usually just use the tip of your needle to gently unpick it and try again. No big deal.
The beauty of beginner cross stitch kits is that they're designed to be forgiving. The real goal isn't a flawless masterpiece; it's to relax and enjoy making something with your own two hands. A stitch that’s a little bit different just adds character and proves it was handmade with love!
"How Long Will a Beginner Kit Take Me?"
This really depends on the stitcher, but most starter kits are designed to be a quick, satisfying win. You could easily finish a small project over a weekend or in a few cozy evenings. It's a fantastic way to get that "I made this!" feeling and build your confidence for a bigger project down the road.
Cross stitch is your time to unwind, not a race to the finish line. The time it takes is far less important than the fun you have along the way. Stitch at whatever pace feels good to you and just enjoy the moment.
"Do I Really Need to Use an Embroidery Hoop?"
While a lot of our all-in-one cross stitch kits come with one, you might find some that don't. We highly recommend using a hoop! It keeps the fabric taut (that’s just a fancy word for tight), which makes it so much easier to create lovely, even stitches.
If your kit doesn’t include one, grabbing a simple 4 or 5-inch wooden hoop is a small investment that will make a world of difference to your stitching experience.
Ready to kick off your creative journey with a kit that’s got your back? Check out the amazing beginner-friendly collection at Stitch Mingle and find a project you'll love. Find your perfect kit today!
