

There’s something truly special about creating a beautiful flower design with just a needle and thread. It's a craft that’s both relaxing and incredibly rewarding, letting you watch vibrant blooms come to life one stitch at a time. If you're looking for a perfect entry point into the world of needlecraft, floral cross stitch is it.
Your Journey into Floral Cross Stitch Begins Here
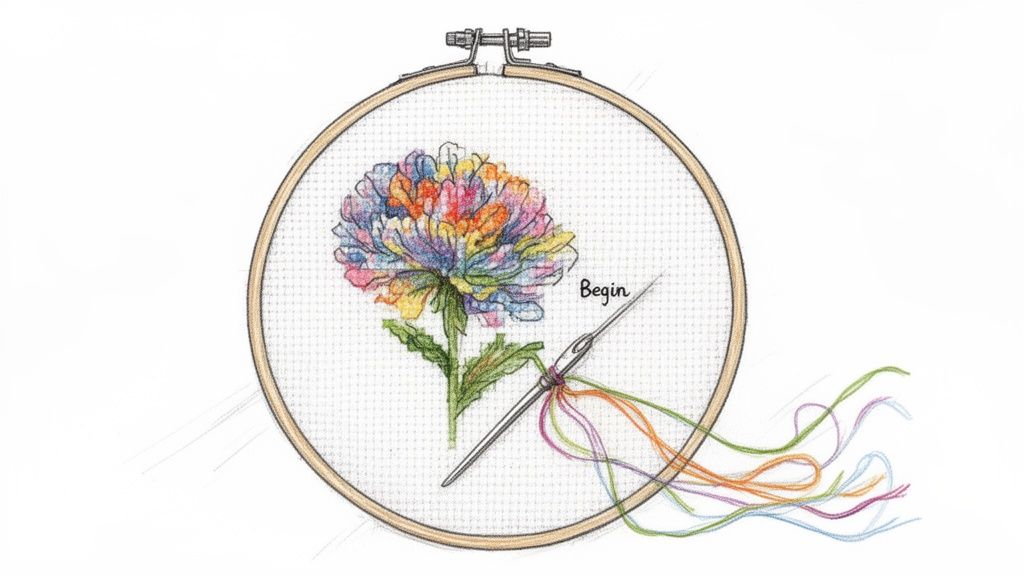
Have you ever looked at a beautifully stitched flower and thought, "I wish I could do that"? Well, you absolutely can, and you've come to the right place to start. Floral patterns are a classic for a reason—they're a joy to create for stitchers of all skill levels, from complete beginners to seasoned pros.
This guide is all about the pure fun of making something beautiful. I’ll walk you through everything, showing you how to turn a few simple materials into a piece of art you can be genuinely proud of. The whole process is much easier than it looks, and I'll be here to help you at every step.
Why Flowers Are a Perfect Starting Point
Floral designs are just timeless, aren't they? They hold a special place in the hearts of crafters and offer an amazing variety of projects. You can start with a simple, single-colour daisy for your first piece or dive into a lush, multi-coloured bouquet that offers a satisfying challenge. It's this versatility that makes them so popular.
Here in Canada, for example, patterns featuring provincial flowers like the Prairie Crocus or the Pacific Dogwood are always in high demand. It’s part of a bigger trend we’re seeing where nature-inspired art is really resonating with crafters. In fact, Canadian-themed patterns, many with floral motifs, made up over 25% of all regional pattern downloads in North America in 2024.
What exactly is cross stitch? It's a type of counted-thread embroidery. Basically, you create each stitch on a special, evenly woven fabric by counting the threads. This grid-like system makes it super approachable for beginners because the pattern—or chart—tells you exactly where every single stitch goes.
What You Will Learn in This Guide
I've put this guide together to feel like you're in a friendly, hands-on workshop with me. By the end, you'll have all the skills and confidence you need to create your first flower cross-stitch project from start to finish.
- Picking the right supplies: We’ll cover the essentials, from fabric and floss to the best needles and hoops for the job.
- Reading a pattern like a pro: I'll show you how to make sense of all the charts and symbols. It’s easier than it looks!
- Mastering the key stitches: You'll learn the handful of stitches needed for almost any floral design.
- Finishing your masterpiece: Get my favourite tips for washing, ironing, and displaying your finished work.
If you're wondering how cross stitch is different from other types of needlecraft, you might find my detailed comparison of cross stitch vs. embroidery helpful.
Ready? Let’s get you started on a creative journey that’s been loved by artisans for centuries.
Setting Up Your Stitching Toolkit
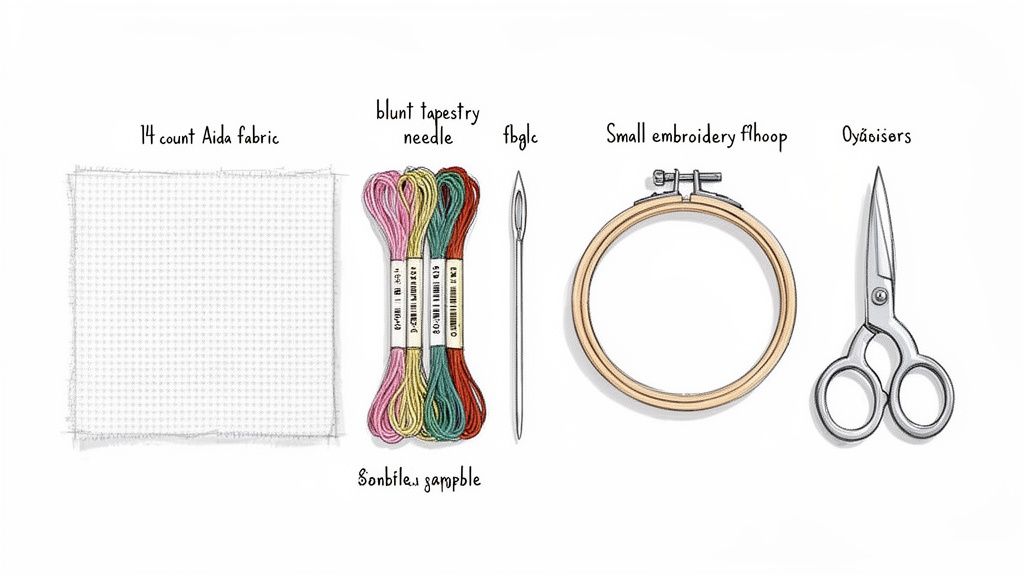
Before you can bring those beautiful flowers to life, you’ll need to gather your tools. Think of it like setting up an artist's palette—it’s a pretty simple kit, but choosing the right supplies from the get-go makes all the difference. Let's walk through the essentials so you feel ready and excited, not overwhelmed.
The first thing you’ll need is your canvas. In the world of cross-stitch, this is usually Aida fabric, a wonderful cotton material woven with a precise grid that makes stitching a breeze. Aida comes in different "counts," which simply refers to how many little squares (and therefore stitches) you can fit into one inch of fabric.
For your first flower project, I almost always recommend 14-count Aida. The squares are big enough to see clearly, which is a huge help when you're just starting out. Once you get the hang of it, you might want to try a higher count like 18-count Aida, which has smaller squares and gives your finished piece a more detailed, refined look.
Choosing the Right Aida Fabric for Your Flower Project
Picking the right fabric count can feel like a big decision, but it's really about balancing detail with ease of stitching. Here’s a quick breakdown to help you choose the best Aida for your floral design.
| Aida Count | Stitches Per Inch | Best For | Finished Look |
|---|---|---|---|
| 11 | 11 | Absolute beginners, kids, or rustic projects | Chunky, very visible stitches |
| 14 | 14 | The go-to for beginners; most kits use this | Clear, defined stitches that are easy to see |
| 16 | 16 | Intermediate stitchers wanting more detail | A slightly finer, more delicate look than 14-count |
| 18 | 18 | Experienced stitchers or detailed patterns | Smooth and refined, almost like a printed picture |
Ultimately, there’s no wrong choice! But starting with 14-count gives you the best chance to fall in love with the process without straining your eyes.
Fabric, Floss, and Needles
Next up is your "paint"—the embroidery floss. This is the vibrant thread that will form your flowers. Most patterns, especially for floral subjects, call for DMC cotton floss. It’s the industry standard for a reason: the quality is fantastic and the range of colours is absolutely massive. Each little bundle, or skein, has a number code that matches a specific shade on your pattern chart.
A standard skein of floss is actually made of six tiny strands twisted together. Your pattern will tell you how many strands to use at once, but for a standard cross-stitch, it's almost always two.
My go-to trick for preventing knots: Cut a piece of floss about the length of your forearm (from elbow to fingertips). Gently pull out one strand at a time, then put your required two or three strands back together. This little step makes a world of difference!
To get that floss onto the fabric, you'll need a tapestry needle. These are different from regular sewing needles because they have a blunt tip and a larger eye. That blunt end is a game-changer; it helps you glide smoothly through the holes in the Aida without accidentally piercing the fabric threads. For 14-count Aida, a size 24 tapestry needle is perfect.
Finally, the real secret to neat, even stitches is good tension. An embroidery hoop is your best friend here. It holds the fabric taut, like a tiny drum, which stops it from puckering and makes it so much easier to guide your needle into the right holes. A simple 5 or 6-inch wooden hoop is all you need to start.
The Easy Way to Start: A Cross-Stitch Kit
Feeling a bit daunted by the shopping list? I get it. That’s why I often suggest beginners start with a complete kit. These bundles are a brilliant way to dive right in because they come with everything you need: the pattern, pre-cut fabric, all the right floss colours, and a needle.
It takes all the guesswork out of gathering supplies. If that sounds like the right path for you, you can find a great selection of counted cross-stitch kits for beginners to get you started on your first floral masterpiece without any fuss.
How to Read a Floral Cross Stitch Pattern
When you first lay eyes on a cross stitch pattern, it can look a bit like a complex, colourful puzzle. My advice? Think of it more like a treasure map. Every symbol is a clue that will lead you to a gorgeous stitched flower. Let's break down how to read that map so you can start stitching with total confidence.
Every pattern, whether it's a paper printout or a file on your tablet, is based on a grid. Each little square on that grid lines up perfectly with one square of woven fabric on your Aida cloth. It's a simple one-to-one relationship: one square on the chart equals one full cross stitch on your fabric. This clever system is what makes cross stitch so beautifully precise.
While needlework is an ancient craft, this grid system has a surprisingly modern twist. Back in the 1990s, stitching circles, particularly in places like California's Silicon Valley, started digitizing old-school charts. These early tech-savvy stitchers scanned hundreds of classic floral patterns, which paved the way for the digital apps that 65% of today's beginners now use. If you're curious about this history, the Embroiderers' Guild of America is a fantastic resource.
Understanding the Symbol Key
So, how do you know which thread colour goes where? That’s what the symbol key (or legend) is for. Think of it as your pattern’s dictionary.
Here’s how it works:
- Symbols: Each square on the chart has a symbol inside it—maybe a simple dot, a letter, a tiny triangle, or a heart.
- Floss Colour Code: In the key, you'll see that same symbol next to a floss number (like DMC 3818).
- Colour Name: Most keys also give you the colour's name, like "Leaf Green," just to be helpful.
Your mission is just to match the symbol on the chart to the one in the key to grab the right colour. Let’s say you’re working on a rose petal and see a square with a small circle in it. You'd glance at your key, find that circle, and see it corresponds to DMC 321, a classic, vibrant red. Easy as that!
Finding Your Starting Point
One of the biggest secrets to a professional-looking finished piece is getting the design perfectly centred on your fabric. It's a rookie mistake to end up with a design squished to one side, which makes framing a nightmare. Thankfully, finding the middle is simple.
Pro Tip: Always start stitching from the centre of the design and work your way out. This guarantees your flower will be perfectly placed and helps keep your fabric from getting pulled out of shape.
To find the centre of your fabric, just fold your Aida cloth in half lengthwise and give it a light crease. Then, fold it in half the other way. The point where those two creases meet is the exact middle. You can mark it with a pin or even a single loose stitch that you can pull out later.
Now, do the same with your pattern chart. Most designers make this easy by placing little arrows or triangles along the top and side edges to mark the centre lines. Follow those arrows inward to where they intersect, and that’s your starting point. Match this spot on your chart to the marked centre of your fabric, and you're all set to make that exciting first stitch
Mastering Stitches for Realistic Flowers
This is where the real magic happens—where your flower design truly starts to bloom on the fabric. You really don't need a huge arsenal of complicated stitches to create a stunning floral piece. In fact, most gorgeous patterns rely on just a handful of core techniques to build up all that beautiful texture, shape, and personality.
We're going to focus on the essentials. Once you get these down, you'll have the confidence to tackle any floral pattern that catches your eye.
The Essential Full Cross Stitch
The full cross stitch is the heart and soul of your project. It’s the foundational block that builds your entire image, creating that classic pixelated look we all know and love. A full cross stitch is simply two diagonal stitches that form an 'X' over one square of your Aida fabric.
The secret to a polished, professional-looking piece is all about consistency. You’ll want to make sure your top stitches all lie in the same direction, every single time. For example, if you make your bottom stitch from bottom-left to top-right ( / ), make sure every single top stitch goes from bottom-right to top-left ( \ ). This one simple habit creates a beautiful, even texture across your entire piece.
My Go-To Tip: When I'm working a large block of a single colour, I always stitch a whole row of the bottom halves first (like this: /////), then work my way back along the row, completing the tops (\\\). This technique, often called the Danish method, isn't just faster—it also makes it so much easier to keep your tension even.
Adding Depth with Half Stitch and Backstitch
While the full cross stitch does most of the heavy lifting, it's the other stitches that add the artistic flair needed to make a flower look truly realistic. Think of these as the details that turn a flat image into something with genuine depth and definition.
-
The Half Stitch (/): It’s exactly what it sounds like—just the bottom half of a full cross stitch. Designers often use it to create subtle shading, soft background textures, or the illusion of distance. In a flower pattern, you might see half stitches used to soften the edge of a petal or to fill in the sky, making the main flower pop.
-
The Backstitch (—): I like to think of backstitching as drawing with thread. It’s perfect for outlining shapes, defining delicate petals, creating slender stems, and adding fine details like the veins on a leaf. A crisp backstitch can transform a blurry-looking flower into a sharp, well-defined image. It’s that final touch that really makes your design sing.
If you're just starting out, getting your hands on a kit is a fantastic way to see these stitches in action and get some practice. You can learn more about finding the perfect starter project in our guide to embroidery kits for beginners.
Creating Texture with French Knots
Please, don't be intimidated by the French knot! I know it has a reputation for being tricky, but with a little bit of practice, it becomes an amazing tool for adding pops of texture. For floral designs, French knots are absolutely perfect for creating the realistic centres of daisies and sunflowers, or for adding those tiny little buds to a sprig of lavender.
The trick is to hold the floss taut as you wrap it around the needle and gently pull it through the fabric. Most patterns will tell you to wrap the thread once or twice around the needle—the more wraps, the bigger your knot. It’s a tiny detail that adds an incredible amount of dimension.
This visual guide shows the simple flow of finding your spot on the chart and matching it to your fabric to get started.
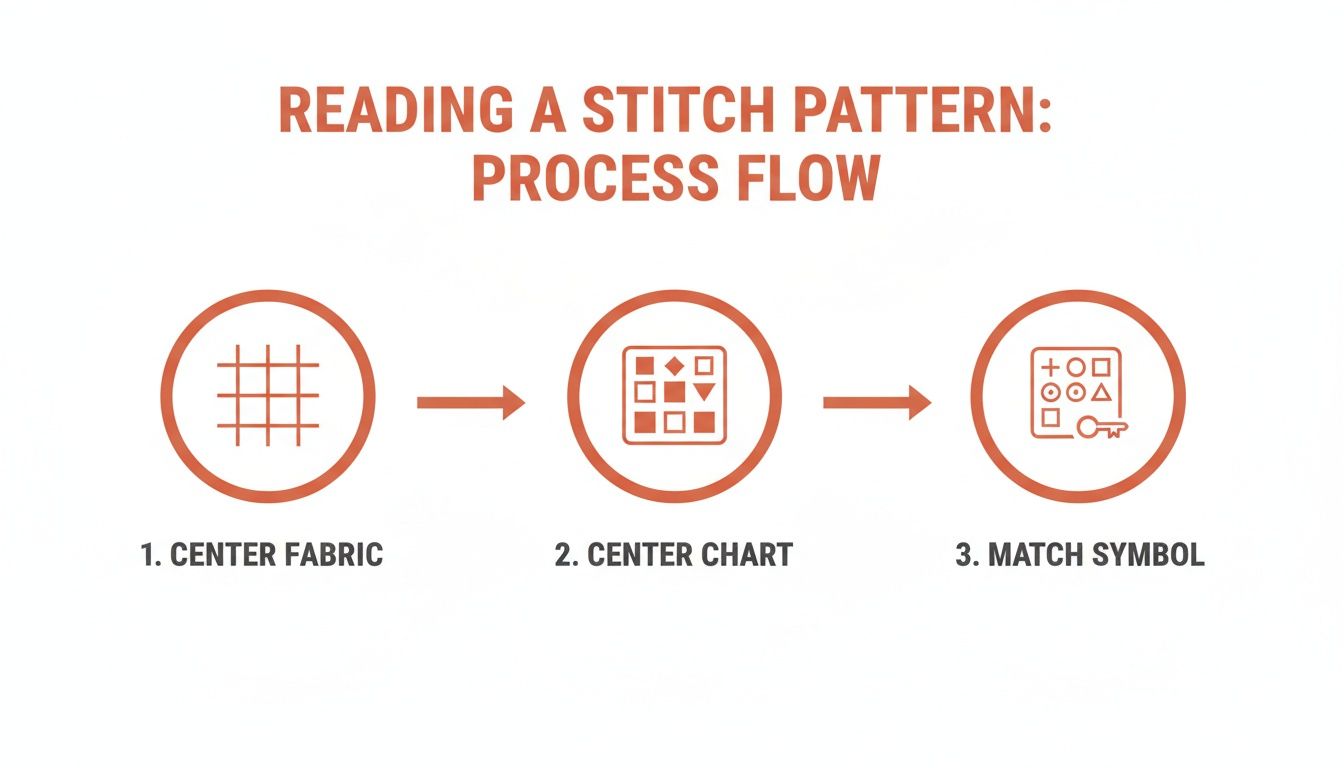
Following this process ensures your very first stitch is perfectly placed, setting you up for a beautifully centred piece you can be proud of.
Finishing and Displaying Your Floral Art
That last stitch feels amazing, doesn't it? But taking a little time to properly finish your piece is what will really make your beautiful flower design sing. These final steps will give your work a polished, professional look that’s ready for the spotlight.
Giving It a Gentle Clean and Press
First things first, let's give your piece a quick, gentle bath. As you stitch, natural oils from your hands, dust, and maybe some hoop marks can build up on the fabric. A simple wash in lukewarm water with a tiny drop of mild soap (like a gentle dish soap) is all you need.
Just let it soak and swish it around for a few minutes, then rinse it really well in cool, clean water. To dry, lay it flat on a thick, clean towel, place another towel on top, and roll it up like a burrito to press out the excess water. Whatever you do, never wring it out! That can stretch and distort your beautiful stitches.
While the fabric is still a little damp, it’s time for a press. Place your cross stitch face down on a fluffy towel and iron it from the back using a medium-hot setting. This nifty trick prevents your stitches from getting squashed flat and leaves your fabric perfectly smooth.
Framing and Displaying Your Masterpiece
Once it’s dry and crisp, your work is officially ready for its big debut! Now comes the fun part: deciding how to show it off.
There’s no one right way to do it, and the options are endless.
-
Classic Framing: A traditional frame is a timeless choice that turns your cross stitch into a true piece of art. I always try to pick a frame that pulls out one of the colours in the floral design. Using a mat is also a great idea, as it creates a bit of space so your stitches aren't pressed right up against the glass.
-
Modern Hoop Display: For a more contemporary, rustic vibe, finishing your piece in a clean embroidery hoop is a super popular and easy option. All you have to do is trim the extra fabric around the back and secure the edges with a bit of craft glue or a quick running stitch to keep things tidy.
Getting Creative With Your Creations
Don't feel like you have to hang everything on a wall! Your floral art can become a beautiful, functional part of your home. A small stitched rose could be the centrepiece of a decorative pillow, or a vibrant bouquet could become an amazing, one-of-a-kind patch on a tote bag or denim jacket.
These final touches are what transform your project from a work-in-progress into a treasure. It’s about honouring the time and care you poured into every single stitch.
The love for showing off stitched flowers is real. In California, for example, entries of flower designs in state fairs jumped by 31% between 2020 and 2024. A staggering 1,856 of those were cross-stitched floral pieces! This just shows how many of us are excited to share our creations. You can find out more about similar community craft events here.
No matter how you choose to display your finished piece, it’s a celebration of your hard work.
A Few Common Questions About Floral Cross Stitch
It’s totally normal for questions to pop up when you're diving into a new craft, even with a great guide in your hands. Taking on your first floral cross stitch project is exciting, but a few quick answers can make the whole thing feel so much smoother. Here are some of the most common things I get asked by beginners, answered simply to help you stitch with more confidence.
Think of this as your personal troubleshooting guide. It's here to help you get over those little humps so you can get back to the fun part—watching your beautiful flowers bloom stitch by stitch.
What’s the Best Flower Design for a Total Beginner?
Honestly, starting simple is the best way to guarantee you'll have a wonderful first experience. I always tell new stitchers to look for patterns with a limited colour palette and clean, simple shapes. Think of something elegant like a lavender sprig, a single tulip, or a cheerful little daisy.
These kinds of designs are perfect because they mostly use the basic full cross stitch. They let you get into the rhythm of stitching without getting bogged down by tons of "confetti stitches" or constant colour changes.
Many companies offer small kits, often called "weekend projects," and they are an absolute dream for beginners. They're designed to be finished quickly, which gives you that incredible feeling of accomplishment that makes you want to pick up your needle all over again. The goal is to fall in love with the process, and a simple, pretty flower pattern is the perfect matchmaker.
A great first project is one you can actually finish. Choosing a small, manageable flower design builds momentum and confidence, making it far more likely that cross stitch becomes a hobby you genuinely love.
How Do I Keep the Back of My Work Tidy?
Ah, the age-old question of the tidy back! It's true that probably no one but you will ever see it, but keeping the back of your fabric relatively neat does more than just look pretty. A tidy back can actually prevent frustrating knots, tangles, and bulky spots that might show through on the front.
A brilliant habit to get into right from the start is to avoid "travelling" your thread across large, unstitched areas on the back. It’s tempting to just jump from one section to another, but it's much better to end your thread and restart it in the new spot. This simple step prevents long, loopy strands that can easily get snagged by your needle later on.
Here are a couple of my favourite techniques for a neat finish:
- The Loop Start: If your pattern calls for an even number of strands (like the very common two strands), this method is a game-changer. It creates a secure, knot-free anchor to begin your stitching.
- Weaving in the Ends: When you're ready to finish a length of floss, just turn your work over and carefully weave the tail under three or four completed stitches on the back. It’s secure, lies flat, and is completely invisible from the front.
My Thread Keeps Tangling! What Am I Doing Wrong?
First off, you're not doing anything wrong! This is hands down the most common frustration for every single stitcher, from brand-new beginners to seasoned experts. Floss just has a natural tendency to twist, but there are a few simple tricks you can use to tame it.
The number one culprit is usually using a piece of floss that's just too long. It seems more efficient, but trust me, it's a recipe for knots. A good rule of thumb is to cut a length no longer than from your fingertips to your elbow—about 18 inches is perfect.
Another little trick is to separate your strands of floss one by one before you group them back together for stitching. Even if you're using two strands, pull each one out individually first. This simple action removes the factory twist from the skein and dramatically cuts down on tangles. Finally, try to get into the habit of letting your needle and thread dangle freely every few stitches. This allows the thread to naturally untwist itself.
Can I Use Different Floss Colours Than the Pattern Suggests?
Absolutely! This is where you really get to step into the artist's role and make a design your own. Swapping out colours is a fantastic way to personalize a project, match it to your home decor, or just use up some floss you already have in your stash.
The key to a successful colour swap is to maintain the "value" of the original colours. For example, if you're stitching a rose that uses light pink, medium pink, and dark pink for shading, you could easily switch to light purple, medium purple, and dark purple to get a similar, beautifully shaded effect.
Just be sure to make a note of your colour substitutions on your pattern chart. A quick pencil mark next to the original symbol will save you a world of confusion later on. Have fun with it—this is your chance to create a floral cross stitch piece that's truly one-of-a-kind!
Ready to start your creative journey? At Stitch Mingle, we offer a beautiful selection of beginner-friendly kits that include everything you need to create something you'll be proud of. Explore our collection and find your perfect project at https://stitchmingle.com.