
This guide provides a technical overview of 10 beginner-friendly craft projects suitable for completion at home. Each section details the necessary materials, core techniques, and expected outcomes, focusing on projects with a high success rate for novices. We will cover leatherwork, embroidery, and mixed-media crafts, many of which can be streamlined using all-in-one DIY kits. The objective is to equip you with the foundational knowledge to select a project and execute it successfully, creating durable, functional, and personalized items.
1. DIY Leather Craft Bag Kits
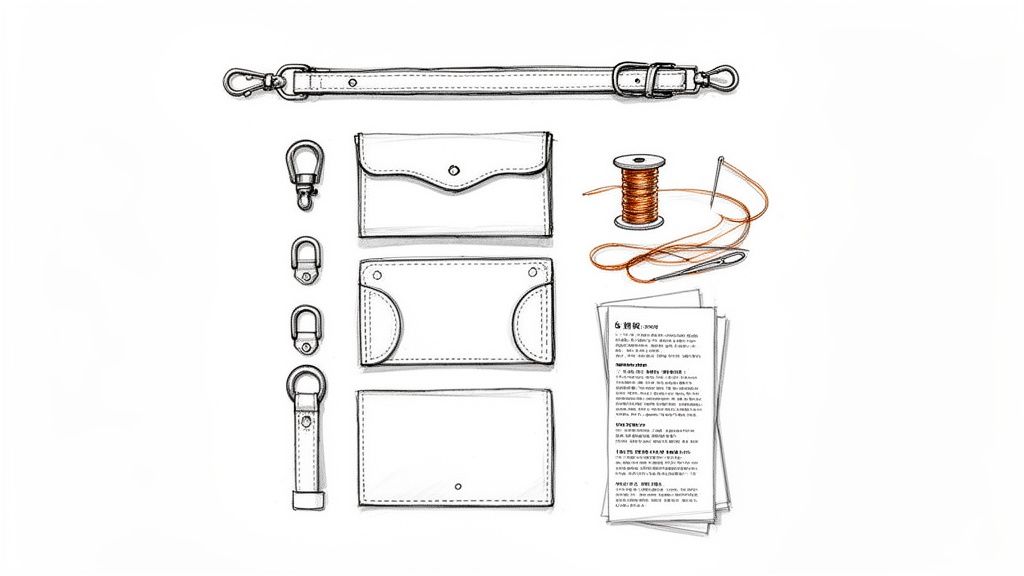
DIY leather craft bag kits are a structured entry point into leatherworking, a discipline that combines artistry with engineering. These kits are designed to produce a professional-grade accessory by simplifying the most technically demanding steps: pattern drafting and leather cutting. The primary components include pre-cut vegetable-tanned or chrome-tanned leather panels (typically 1.2-1.8 mm thickness), pre-punched stitching holes (avg. 4 mm spacing), waxed polyester or linen thread (e.g., Ritza 25 Tiger Thread), blunt-tipped saddle needles, and all necessary metal hardware (rivets, buckles, clasps).
From a chic crossbody like Stitch Mingle's popular Kainy bag kit to a sturdy Peak tote, you can create a professional-looking accessory in a weekend. The result is a durable, functional piece you can proudly say you made yourself.
How-to: Assemble a Leather Bag Kit
- Inventory Components: Lay out all leather panels and hardware. Cross-reference with the kit's manifest to ensure all parts are present. Sort hardware by type.
- Master the Saddle Stitch: Practice the two-needle saddle stitch on a scrap piece of leather. This interlocking stitch provides superior strength compared to a standard lockstitch. A stitching pony is recommended to hold the leather vertically, freeing both hands.
- Assemble Main Body: Following the instructions, begin stitching the main panels. Maintain consistent thread tension to avoid puckering.
- Attach Hardware: Install buckles, snaps, or zippers as directed. This may require setting rivets with a rivet setter and anvil.
- Finish Edges: For a professional finish, burnish the raw edges using water or gum tragacanth and a wooden slicker. This compacts the leather fibers, creating a smooth, sealed edge.
For a deeper dive into the essential techniques, explore our guide on how to sew leather by hand.
2. DIY Leather Keychain & Charm Kits
These kits provide a high-yield, low-investment introduction to working with leather, making them one of the most accessible and easy crafts to do at home. Projects are completed in under an hour and require minimal technical skill. Kits include pre-cut leather shapes (often from 2-3 oz. leather), polyester fiberfill for 3D designs, adhesive (contact cement) or pre-punched holes for stitching, and hardware such as split rings or lobster clasps.
From a plush Stitch Mingle Puppy keychain to a huggable Bear charm, you can craft a unique piece to adorn your keys, backpack, or purse. These kits are also perfect for making personalized gifts, party favours, or even for group activities like team-building workshops.
How-to: Create a Leather Charm
- Prepare for Assembly: If stitching, thread your needle. If using adhesive, ensure your workspace is ventilated.
- Stitch or Glue: Align the two leather pieces. Stitch around the perimeter using a simple running stitch or whip stitch, leaving a small opening. For no-sew kits, apply a thin, even layer of contact cement to the edges of both pieces and let it become tacky before pressing them together.
- Add Stuffing: Gently push polyester fiberfill into the charm through the opening to achieve the desired plumpness.
- Seal and Finish: Stitch the opening closed. Attach the keyring or clasp through the designated hole or loop.
- Optional Burnishing: For a cleaner look, lightly burnish the stitched edges with a wooden slicker.
Explore our collection of adorable DIY Leather Keychain & Charm Kits to find your next mini-project.
3. Embroidered Patches & Monograms (Iron-On and Hand-Embroidered)
This craft offers two distinct methodologies: rapid application via thermoplastic adhesive (iron-on) or traditional surface embroidery. Iron-on patches utilize a heat-activated adhesive backing. Hand-embroidery kits provide a pattern (pre-printed on fabric or a water-soluble stabilizer), embroidery floss (typically 6-strand cotton), an embroidery hoop (to maintain fabric tension), and needles. This versatility makes it one of the most adaptable and easy crafts to do at home.
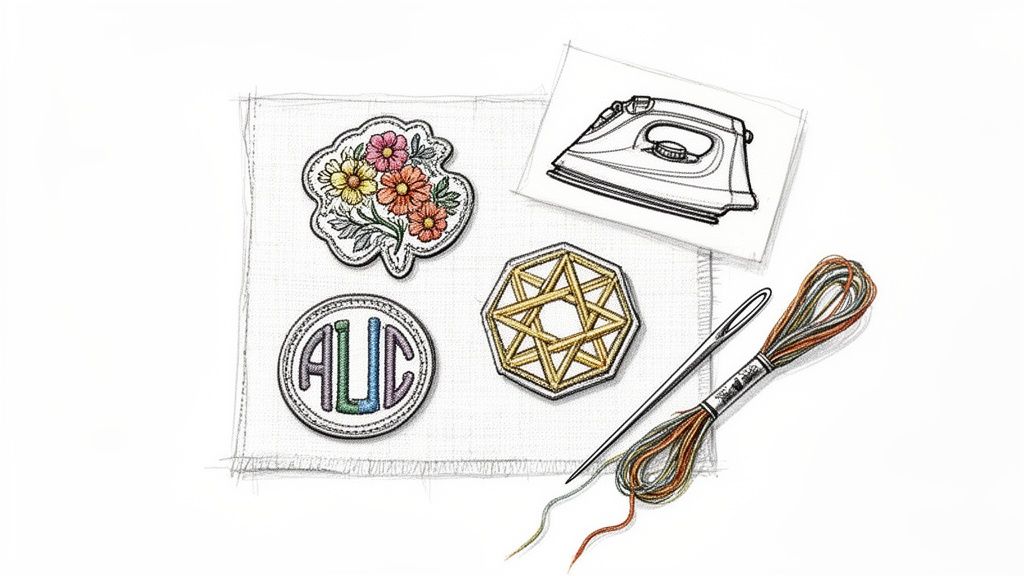
Popularized by the Gen Z DIY fashion movement on TikTok and the enduring appeal of personalized gear, this craft transforms everyday items into unique statements. From adding scout merit badges to a sash to framing embroidered art, the possibilities are endless and always impressive.
How-to: Apply and Create Embroidered Details
For Iron-On Patches:
- Pre-heat Iron: Set your iron to a medium-high temperature (cotton setting, approx. 150°C), with steam turned off.
- Prepare Fabric: Pre-wash and iron the garment to remove sizing and wrinkles.
- Position and Press: Place the patch on the garment. Cover with a pressing cloth (e.g., a thin cotton towel). Press firmly with the iron for 15-20 seconds. Do not slide the iron.
- Secure: Turn the garment inside-out and press the area behind the patch for another 10-15 seconds to ensure the adhesive fully melts into the fabric fibers.
For Hand-Embroidery:
- Mount Fabric: Secure the fabric tautly in an embroidery hoop.
- Follow Pattern: Using 2-3 strands of embroidery floss, follow the pattern using basic stitches like the backstitch for outlines and satin stitch for fills.
- Finish: Once complete, secure the final stitch on the back, trim excess fabric, and finish the hoop for display or remove the fabric for use.
To explore your creative potential, check out our guide on embroidery kits for beginners.
4. Plastic Canvas Embroidery Kits
Plastic canvas craft utilizes a rigid grid made of plastic (typically #7 mesh, meaning 7 holes per linear inch) as a foundation for yarn embroidery. This structure eliminates the need for a hoop and simplifies stitch counting, making it a highly accessible and easy craft to do at home. Kits provide pre-cut canvas shapes, acrylic or wool yarn, a large-eyed tapestry needle, and a color-coded pattern chart.
You can create a huge variety of three-dimensional and flat items, from a set of geometric coasters to a charming small storage box or personalised bookmarks. The finished pieces are durable and functional, making them fantastic handmade gifts or unique additions to your home décor.
How-to: Master Plastic Canvas
- Read the Chart: Familiarize yourself with the pattern chart. Each square on the chart corresponds to one square on the plastic canvas grid.
- Cut Yarn: Cut a manageable length of yarn (approx. 18 inches) to prevent tangling.
- Begin Stitching: Following the chart, use basic stitches like the Tent Stitch (a simple diagonal stitch over one intersection) or Continental Stitch. Leave a short tail on the back and secure it by working your first few stitches over it.
- Assemble 3D Objects: To join pieces for a 3D object, use a whip stitch to sew the edges together.
To explore creative ways to use this medium, discover how to make a durable and stylish plastic canvas bag.
5. Hand-Stitched Personalized Leather Wallets
Creating a functional, stylish accessory from scratch is immensely satisfying, and hand-stitched leather wallet kits make this sophisticated project one of the most approachable easy crafts to do at home. These all-in-one kits provide pre-cut and pre-punched leather panels, along with the necessary waxed thread, needles, and hardware. By eliminating the difficult steps of pattern design and precise cutting, you can jump straight into the rewarding process of stitching a beautiful, durable wallet.
Whether you’re crafting a slim, minimalist cardholder or a classic bifold with a coin pocket, the result is a high-quality accessory that’s both practical and personal. These kits are perfect for making a heartfelt, customised gift for someone special or simply treating yourself to a premium handmade item you can use every day.
How-to: Construct a Leather Wallet
- Organize Components: Lay out all leather panels according to the assembly diagram. Identify pieces for card slots, the main body, and any coin pockets.
- Prepare for Stitching: Clamp the first two panels in a stitching pony. Measure a length of waxed thread approximately 3-4 times the length of the seam. Thread a needle onto each end.
- Execute the Saddle Stitch: Pass one needle through the first hole. Even the thread on both sides. Pass the left needle through the second hole, then pass the right needle through the same hole from the opposite side, ensuring not to pierce the thread. Pull both needles tight. Repeat for the length of the seam.
- Finish the Seam: To secure the stitch, backstitch over the last 2-3 holes. Snip the thread close to the leather and melt the end with a lighter for a permanent seal.
- Assemble Remaining Sections: Continue joining panels as per the instructions, paying close attention to the correct layering of card slots.
- Edge Finishing: Apply an edge beveler to round the sharp edges, then burnish with gum tragacanth and a slicker for a professional, smooth finish.
6. DIY Personalized Leather Bracelets & Cuffs
Looking for a quick, stylish, and highly personalisable project? DIY leather bracelets and cuffs are a fantastic entry point into leathercraft and one of the most satisfyingly easy crafts to do at home. These projects often use pre-cut leather strips and simple hardware like rivets or snaps, removing the need for complex stitching. It's a craft that allows for maximum creativity with minimal setup.
You can create anything from minimalist single-wrap bracelets to bold, stacked cuff sets. This craft is perfect for making personalised gifts, party favours for a bachelorette party, or even coordinated team spirit accessories. In under an hour, you can have a wearable piece of art that reflects your unique style.
How-to: Assemble a Leather Bracelet
- Size the Bracelet: Wrap the leather strip around your wrist to determine the correct size, leaving a slight overlap for the closure. Mark and trim the excess leather.
- Punch Holes: Use a rotary leather punch or a punch and anvil to create clean holes for the snap or rivet closure. Ensure the hole size matches the hardware post.
- Set the Closure: A line-20 or line-24 snap is common. A snap setter kit includes an anvil, a setter for the cap, and a setter for the post. Place the hardware components through the holes and use the corresponding tools and a mallet to set them securely.
- Personalize (Optional): Before attaching hardware, use metal stamps to emboss initials or use leather-safe paints to add a design.
- Finish Edges: For a refined look, use an edge beveler to slightly round the edges, then burnish with a slicker.
Explore our range of simple kits in the Stitch Mingle quick-gift collection to find your perfect starting point.
7. Fabric Scrap Appliqué & Patchwork Projects
Turn that growing pile of leftover fabric into a masterpiece with appliqué and patchwork. This craft is a wonderfully sustainable way to make something beautiful and new from something old, making it one of the most resourceful and easy crafts to do at home. Instead of buying new materials, you can upcycle scraps to create colourful, textured designs on everything from tote bags and pillows to unique wall art. It’s a perfect way to give new life to old favourites and reduce waste.
You can create a patchwork quilted tote, a personalized wall hanging with a fabric collage, or add bold appliqué patches to an old denim jacket. The possibilities are endless, allowing you to create one-of-a-kind pieces that are bursting with personality and charm.
How-to: Create a No-Sew Appliqué Design
- Prepare Fabrics: Pre-wash and press all fabric scraps and the base fabric to prevent shrinkage.
- Design and Cut: Sketch your design onto the paper side of a sheet of paper-backed fusible web. Roughly cut out the design.
- Fuse to Scrap: Iron the fusible web (rough side down) onto the wrong side of your chosen fabric scrap.
- Cut Final Shape: Carefully cut out your design along the sketched lines. This will give you a fabric shape with an adhesive backing.
- Apply to Base: Peel off the paper backing, position your appliqué shape on the base fabric, and press with a hot iron (as per fusible web instructions) to permanently bond it. For added durability, you can stitch around the edges with a decorative blanket stitch.
8. DIY Personalized Tote Bag Customization
Transforming a plain canvas tote into a personalized masterpiece is one of the most practical and easy crafts to do at home. Whether you're into hand-painting, embroidery, or block printing, customizing a tote bag allows for endless creativity. Kits often provide blank totes and the specific materials needed, from fabric paints to embroidery floss, making it simple to add names, artistic patterns, or custom designs. It’s a fantastic way to create a functional item that reflects your unique style.
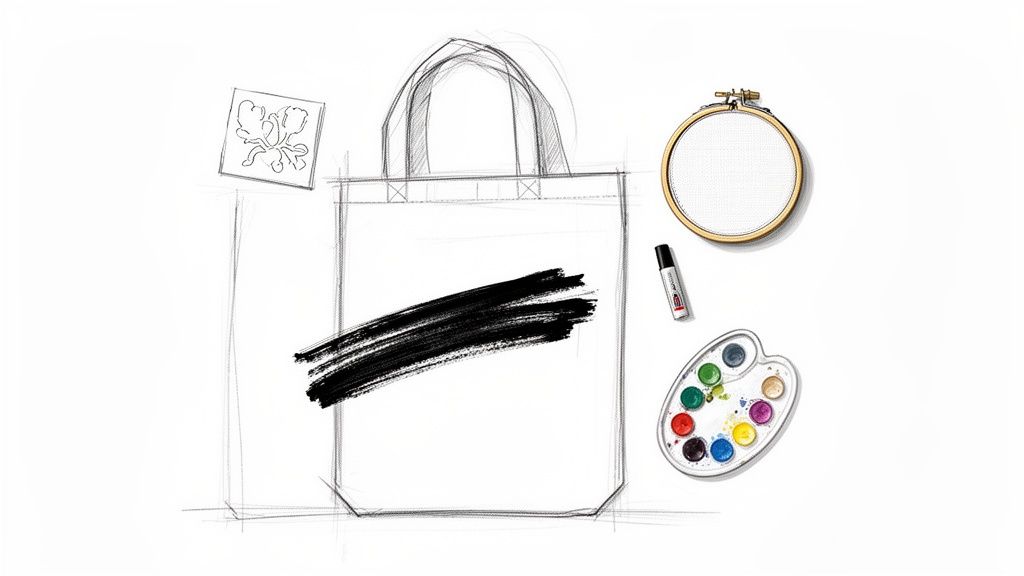
You can create anything from a hand-painted tote with family names to an embroidered bag with a favourite quote. This craft is perfect for making thoughtful, personalised gifts or even creating branded merchandise for a small business or event. The result is a durable, everyday accessory that’s both useful and beautiful.
How-to: Customize a Tote with Fabric Paint
- Prepare Tote: Pre-wash and dry the canvas tote to remove sizing. Iron it smooth.
- Create a Barrier: Place a piece of cardboard or plastic inside the tote to prevent paint from bleeding through to the other side.
- Transfer Design: Use a stencil or freehand your design onto the tote with a pencil or disappearing-ink fabric marker.
- Apply Paint: Use fabric-specific acrylic paints. Apply paint in thin, even layers, allowing each layer to dry before adding the next. This prevents cracking.
- Heat-Set the Paint: Once the paint is completely dry (wait at least 24 hours), heat-set the design. Place a pressing cloth over the design and iron on a high, dry setting for 3-5 minutes. This makes the paint permanent and washable.
To explore more personalized projects, check out our collection of customizable leather keychains and accessories.
9. Hand-Stamped & Personalized Leather Accessories
Want to add a personal touch to your creations? Hand-stamping is a fantastic way to turn simple leather pieces into meaningful, heirloom-quality keepsakes, making it one of the most satisfying and easy crafts to do at home. Using a set of letter stamps and a mallet, you can permanently emboss names, initials, dates, or quotes onto pre-cut leather items. This technique offers a professional finish without needing complex tools or machinery.
From personalized bookmarks and keychains to custom coasters and gift tags, the possibilities are endless. The process is quick, enjoyable, and results in a beautifully bespoke item perfect for gifting or keeping. It’s a wonderful way to commemorate a special occasion or simply add a unique flair to everyday accessories.
How-to: Hand-Stamp Leather
- Prepare the Leather: For vegetable-tanned leather, lightly dampen the surface with a sponge ("casing" the leather). This softens the fibers and allows for a deeper, crisper impression. Do not case chrome-tanned leather.
- Secure Your Work: Place the leather on a solid, stable surface, like a granite slab or a heavy anvil, to absorb the force of the strike.
- Align the Stamp: Hold the metal stamp perpendicular to the leather surface. Use a ruler or a line guide for alignment.
- Execute the Strike: Give the end of the stamp one firm, confident strike with a leatherworking mallet (rawhide, poly, or maul). A single strike prevents double impressions ("ghosting"). The required force will vary based on the leather's hardness and thickness.
- Finish: After stamping, you can apply a leather conditioner or antique gel to enhance the contrast of the impression and protect the leather.
To find the perfect canvas for your next project, explore Stitch Mingle’s collection of leather blanks and pre-cut pieces.
10. DIY Jewelry Making with Beads & Leather Cord
Ready to design your own wearable art? DIY jewelry making with beads and leather cord combines natural textures with vibrant colours, making it one of the most versatile and easy crafts to do at home. This craft allows you to create everything from bohemian-style necklaces to minimalist bracelets using simple assembly techniques rather than complex sewing. Kits provide all the essentials, including cords, beads, and metal findings, so you can start creating immediately.
You can craft unique accessories like adjustable cord bracelets with sliding knots, boho anklets with shells, or personalised name bracelets. The result is a custom piece of jewelry that perfectly reflects your style or makes a thoughtful, handmade gift for someone special.
How-to: Create an Adjustable Sliding Knot Bracelet
- Cut the Cord: Cut a piece of leather or waxed cotton cord long enough to wrap around your wrist with a few extra inches. Cut a second, smaller piece (about 6-8 inches) for the knot.
- Add Beads: String your chosen beads onto the main cord.
- Form the Bracelet: Overlap the two ends of the main cord.
- Create the Sliding Knot: Take the smaller cord and tie a square knot (or a series of them, known as a macrame square knot) around the overlapped ends of the main cord.
- Secure the Knot: Trim the excess ends of the small cord and secure them with a tiny drop of clear glue (like F-6000 or Hypo Cement) to prevent fraying and ensure the knot holds. The bracelet can now be adjusted by sliding the main cords through this knot.
For a project that combines leather with beading, check out Stitch Mingle's elegant Leather Tassel & Bead Charm Kits.
Comparison of 10 Easy At-Home Crafts
| Item | 🔄 Implementation Complexity | Resource Requirements | ⚡ Time / Efficiency | 📊 Expected Outcomes & Key Advantages | 💡 Ideal Use Cases / Quick Tips |
|---|---|---|---|---|---|
| DIY Leather Craft Bag Kits | Medium (🔄🔄🔄) — assembly & hand-stitching | Pre-cut leather, hardware, basic stitching supplies, tutorials | 4–8 hours | ⭐⭐⭐⭐⭐ Professional-looking, durable, functional bag; high gift value | Weekend project; follow videos; start with simple designs |
| DIY Leather Keychain & Charm Kits | Low (🔄🔄) — minimal stitching/adhesive | Pre-cut shapes, keyrings/clasps, small hardware | 30 min–2 hours | ⭐⭐⭐⭐ Fast, affordable, very giftable; limited customization | Great for parties/workshops; pre-punch holes; use thimble |
| Embroidered Patches & Monograms | Varies — iron-on (Low) to hand embroidery (High) | Pre-embroidered patches or floss, needle/iron, backing | 5 min–20+ hours | ⭐⭐⭐⭐ (iron-on) → ⭐⭐⭐⭐⭐ (hand-embroidered heirloom); transforms garments | Pre-wash fabric; use medium heat; practice stitches on scrap |
| Plastic Canvas Embroidery Kits | Low (🔄🔄) — counted-stitch guided | Plastic canvas, pre-marked pattern, embroidery floss, needle | 2–6 hours | ⭐⭐⭐⭐ Durable, functional pieces; very beginner-friendly | Use hoop, count carefully, separate floss strands |
| Hand-Stitched Personalized Leather Wallets | Medium (🔄🔄🔄) — careful hand-stitching | Pre-cut panels, snaps/rivets, awl, waxed thread | 3–6 hours | ⭐⭐⭐⭐⭐ Practical, long-lasting, teaches leather fundamentals | Pre-punch holes, use stitching pony, keep stitch length consistent |
| DIY Personalized Leather Bracelets & Cuffs | Low (🔄🔄) — simple assembly/riveting | Pre-cut strips, snaps/magnets, stamps/paints optional | 15–45 minutes | ⭐⭐⭐⭐ Quick, wearable, ideal for sets/gifts | Punch clean holes, condition edges, seal closures properly |
| Fabric Scrap Appliqué & Patchwork Projects | Medium (🔄🔄🔄) — design planning + sewing | Fabric scraps, backing, fusible webbing or floss, templates | 2–8 hours | ⭐⭐⭐⭐ Unique, sustainable decor; high creative impact | Pre-wash fabrics, use design wall, press and seal edges |
| DIY Personalized Tote Bag Customization | Low–Medium (🔄🔄–🔄🔄🔄) — paint/embroider/appliqué | Blank tote, paints/brushes or floss/appliqué supplies, stencils | 1–4 hours | ⭐⭐⭐⭐ Practical, everyday use; strong gift & branding potential | Pre-wash tote, use fabric paint, heat-set and wash inside-out |
| Hand-Stamped & Personalized Leather Accessories | Low–Medium (🔄🔄🔄) — stamping technique | Pre-cut blanks, alphabet/design stamps, mallet, conditioner | 30 min–2 hours | ⭐⭐⭐⭐⭐ Permanent, heirloom-quality personalization; quick once learned | Practice on scrap leather; mark layout; use leather mallet |
| DIY Jewelry Making with Beads & Leather Cord | Low (🔄🔄) — knotting & assembly | Leather cord, assorted beads, findings, basic pliers | 15–60 minutes | ⭐⭐⭐⭐ Highly customizable, wearable results; great for groups | Organize beads, learn secure knots, seal knot ends for durability |
Conclusion: From Novice to Maker
This technical guide has outlined 10 distinct and easy crafts to do at home, each providing a viable entry point into a new skill set. The key to successful crafting lies not in inherent talent, but in understanding the materials and mastering fundamental techniques. From the precise execution of a saddle stitch in leatherwork to the proper heat-setting of fabric paint, each project offers a lesson in material science and manual dexterity.
The provided "How-to" sections serve as a foundational protocol for each craft. By following these steps—practicing on scrap material, preparing your base components, and using the correct tools for assembly and finishing—you significantly increase the probability of a successful and satisfying outcome. The skills acquired, such as knot tying, rivet setting, or basic embroidery, are modular and transferable to more complex projects in the future.
Your next step is to select a single project that aligns with your interests and available time. Utilize a comprehensive kit to minimize initial investment and logistical hurdles. The transition from reader to creator is achieved through action. Choose your project, acquire the materials, and execute the plan.
Explore Related Stitch Mingle Resources:
